Home
-
How to Make your Music Field Trip Easier

Field trips can be stressful. You have to coordinate budgets, calendars, and all the people so that the day goes well. As the lead adult in the room you also have to select and coordinate all the other adults helping you chaperone your groups. You know you need to give your chaperons certain things so that the day runs smooth and you want prepared chaperones that your students enjoy, so what do you do?
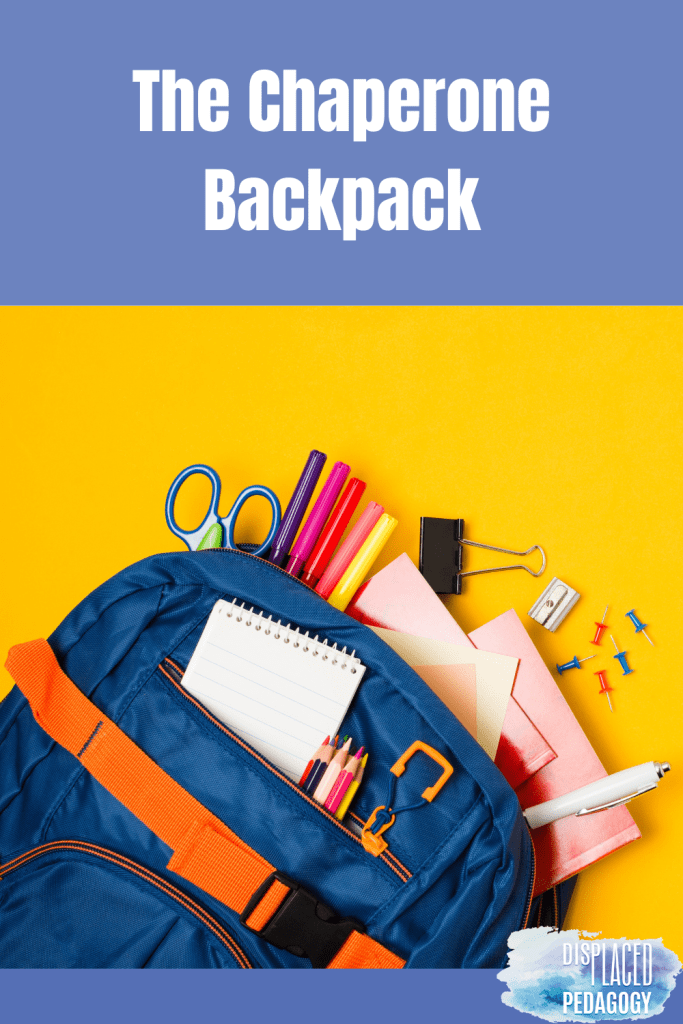
You create The Chaperone Backpack.
What is a chaperone backpack?
The chaperone backpack is quite literally a backpack you give to the (or all) of the chaperones for your field trip. You may or may not need one for yourself depending on the type of field trip. For instance, if you’re traveling to an amusement park for a performance; take the backpack. If your field trip is to choral assessment, then maybe you don’t also need the backpack.
I got this specific backpack from Walmart because it was cheap, but relatively sturdy and its rather gender neutral, in case you need to worry about that. Its expandable and has padding on the straps and back for comfort. And as I was cleaning it out I also discovered that the side pockets hold an entire 16 ounce water bottle!
What goes in the chaperone backpack?
In my chaperone backpack I put all of the following things:
- Rosters
- Field Trip Permission Slips
- Emergency Medications (if applicable)
- First Aid Kit
- Hand Sanitizer
- Deodorant (I taught middle school)
- Gallon Ziploc Bags (for assessment I had my chaperone take all the things students could loose ex. wallets, phones, smartwatches, etc. and place them in bags marked by grade level so we wouldn’t have anything to make us late getting back to school)
- A Schedule for the Day
- Maps (if applicable)
- Student Contacts
- A Sign Out Sheet (I would recommend only one person have this so that one person can help keep an accurate student count)
What did my chaperones think of the chaperone backpack?
My chaperones from assessment both said that they enjoyed the backpack system because literally anything they might have needed was easily accessible and just handed to them in the backpack. Both teachers that I had asked to help chaperone assessment brought their own personal bags just in case, but when it was time to go they just locked their bags in my office or in a cabinet in their classrooms.
One of my lovely chaperones said that he loved that I handed him everything we would need for the day in a bag since he isn’t’ a musician and had never been to that type of event before. He also loved that I made all the students turn in their phones before we entered the building for assessment and that I had a different Ziploc bag for each grades’ phones. He said we had the only group of students all day that was paying attention to other groups performing and he made sure to brag on our students to them and to me.

-
Displays you Need in Your Music Classroom

At the time of writing this, I have three weeks until I go back to school for inservice and four weeks until I see students again (yikes!). So I’m starting to think about my own classroom setup and what I need to put up on the walls. If you are a new teacher and don’t know what you need then I recommend that you keep reading to gather some ideas.
Now I do not have pictures of what I did in my classroom last year, currently. However, I will have pictures soon!

Make sure students can actually see it
Whether you are teaching elementary and have students that are three foot tall kindergartners and 5 foot tall fifth graders, or you teach middle school performance ensembles and the students aren’t moving around to see your walls that much, you need to make sure that students can see what’s on the walls or it’s kind of pointless.
In my classroom I focus on educational displays and I have performance ensembles. I also teach in a high needs area where one of the needs is glasses. Many of my students need glasses and simply can’t afford them. So in all of my classroom decor packs the focus is on making sure that the text is very large and legible from across the room. I even had my percussion students tell me if they could see the word wall from their seats in the very back before I made the design permanent.
If your students can’t see the words on the word wall from where you’ll be asking about vocabulary the most you either need to rethink where the word wall is or think about where they’ll be doing vocabulary activities.
Obviously that rule goes for all content besides vocabulary, but that’s the example I have in mind right now.
Have Educational Displays
I primarily have educational displays in my classroom. I teach band and choir so there’s like one giant word wall for vocabulary for both classes, then there are smaller vocabulary displays around the room for content specific vocabulary.
In addition to the word wall I also have a solfege ladder displayed (which I use for both groups), an instrument family display (still vocabulary?), and a data display. I have to have the data display because my school district requires one. If your school district doesn’t require one then awesome, because it can be a bit of a pain.
I also keep a few sets of mini anchor charts hanging up for my students so that they can use them any time they need. I simply just don’t have enough space to keep anchor charts up all year.
Have displays where you can build community
My favorite displays for community building are made of student artwork. I tape up all of the artwork that students give me throughout the year behind my desk, so that I can just turn around and look at it when I need a boost on those super long days.
This year I really want to try to print out pictures of things that the students do at our community building events (also new this year). For more information on those check back in later; I promise I’ll write a post about it.
Have Some Admin Friendly Displays
So administrators aren’t exactly knowledgeable about music. That’s not a secret. I got to the point where I just decided to hang student work in the hallway because then I didn’t have to have a monthly theme on my hallway bulletin board. However, administrators don’t always know what the students were supposed to be doing on the assignment you are displaying.
I liked showing off rhythmic dictation assignments last year because dictation is a high level skill. Since my administrators don’t know what musical dictation is, I put a piece of paper at the bottom of the bulletin board and explained all the skills that were involved in dictation and what the process looks like.
My principal caught me in the hallway and specifically mentioned that I must be doing a great job with the students if they can do something so advanced with them. So admin really like the student work displays, and helping them understand what they’re looking at goes a long way!
In summary…
There are a few different types of displays that you need to or should have in your classroom as a teacher. I would recommend having more educational displays than anything else, at least one community building display, and an administrator friendly display that you rotate periodically.
If you don’t want to fuss with making all the classroom displays by yourself I have several items in my Tpt store. I am working very hard to get the three product lines finished before the school year begins. If you purchase the bundles now you get any new uploads for free! You should go check it out! -
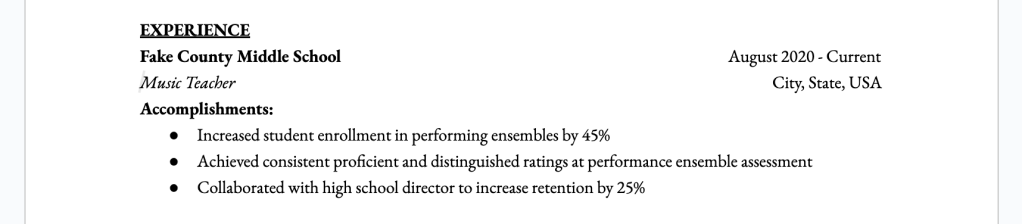
Tips for Creating an Awesome Music Teacher Resume
Whether you are looking for your first job or a new job a great resume and cover letter is a must! Your resume is either your very first, or one of your first impressions with your new school, so it has to be good in order to get that interview to make a better impression. That means you need all the correct information in the correct order and formatted in a visually pleasing manner.
I’ve gone through the wringer writing my own resume and now I have friends who come to me to help them write resumes because they know mine is really good. I’m going to share all the advice that I have to offer in this post and hopefully your resume will look amazing after reading this blog post.
The first half of the blog is going to go over what information you need to include and in what order, the second half is where I will give you all of my tips about formatting the resume so that it gets read.

What information should you put in your resume?
Education
Relevant experience
Leadership experience
Relevant skills
Awards and honors
Skills
Publications/ conference appearances
What order should your sections go in?
New Grads
Education
Relevant experience
Leadership experience
Relevant skills
Awards and honors
The reason that your sections should go in this order is because you just got out of school. You may not have very much relevant experience, and if you do it wasn’t a long term commitment. Administrators will also know that you’re fresh out of college and will want to know what type of relevant course work you completed.
Relevant experience for us music teachers is anything from band camps, private lessons, and summer camps. Make a list of all of those that you did and the year(s) and locations of each thing.
Were you in a fraternity, sorority, or other student organization? Talk about it, especially if you had a leadership position at any time while you were in college.
Relevant skills include knowing how to use GSuite or the Microsoft Suite effectively. Maybe you are a master at creating and maintaining budgets, maybe you weren’t good at planning instruction, but you were great at keeping students engaged in their learning. There are so many skills that you could pick from as a music teacher.
For Awards and Honors I wouldn’t list every single scholarship you got. List any music specific scholarships you were awarded. And then list honors you received through your student organizations or academic department.
Seasoned Teachers
Work experience
Education
Certifications
Leadership roles
Awards and honors
Skills
Publications/conference appearances
So the sections are flipped around a little bit to reflect that you have had a job now. List any and all jobs you’ve had in your entire career, we will brag about how awesome you are under each job heading.
Education will be similar to when you were a new teacher, you don’t have to go into as much detail because at this point admin cares way more about your practical experience than anything else.
List any and all extra certifications that are related to your job. I will be finished with Orff-Schulwerk Level III and will replace “Orff-Schulwerk Level II” with “Certified Orff-Schulwerk Instructor.” If you have the Google Level 1 training also list that. I personally wouldn’t list all the health and safety training that your school makes you do because that’s pretty standard stuff. But be sure to list anything that is music specific or isn’t a standard thing that almost every educator get certifications for.
This goes without saying, but if you were on any committees at your school or within a professional organization please list that. Treat this as a secondary work experience section.
For awards and honors as a seasoned teacher I would keep it to things that were awarded for a whole school year. For example, I was awarded Teacher of the Month for the month of February at my school. I am not going to list that on my resume because it isn’t a teacher of the year type of thing which is a bit more impressive. I will list that I was awarded several grants for professional development by my professional organizations, if I am selected as the Middle School Music Teacher of the Year by my MEA district I will list that. My cooperating teacher was just awarded Elementary Music Teacher of the Year from my state’s MEA, so that’s a real big deal and needs to be talked about.
If you’ve written anything that got published in an academic journal or industry journal then list the title and all that fun stuff. The same thing goes for any conference presentations that you’ve done. Listing these things on your resume shows that you are a true expert in the field and that you are in innovator in the field. We will go over formatting of all of this stuff in the second half, but seriously, list this kind of stuff!

Formatting Your Resume
Formatting is really important because you only get one page to fit all of this super important stuff. If your resume is too long or too text heavy it won’t even get read. And yes, there is currently a teacher shortage, but that’s only making admin and SBDM councils more weary and tired. Keep the resume light and text, but impactful.
Put your info in the page header
This is my protip because I have quite a few leadership roles, certifications, and other things that I would rather have take up space on my resume instead of my name and address. This is also helpful when your resume goes onto your back page; your personal information is on both pages automatically.

If you’re like me and have a lot that needs to go on a resume then this is a great “hack” and all you have to do is go to “Insert,” “Headers and Footers,” “Headers” and start typing. To insert the black circle like I did you need to go to “Insert,” “Special Characters,” then type “Circle” in the search bar.
Avoid large Chunks of text
No one is going to read all of that. The hiring committee will probably be interviewing people all day and has probably been looking at resumes and cover letters all day. They will not read your resume if if has giant chunks of text in it. Please break it up and create some white space.
Pick one font and stick with it
Between bolding, underlining, italics, and making slight changes to font size you truly do not need any more than one font. This will make your resume easier to format as well because you don’t have to remember which font went where and how you formatted it to look like a certain way. Creating a resume can also be stressful, so this way you wont have to spend a bunch of time wondering if the fonts look nice together.
In the picture of my resume above, you can see that everything was done in one font and I just changed the text formatting a little for each different thing. Once I have established this formatting pattern once I’m just going to keep it nice and consistent through the entire resume and the bold text will keep drawing eyes to the big, broad information that is necessary.
Use “Power Words” to make a large impact
Which sounds better?
- Facilitated student learning of 10-minutes of music and movement for local, district, and state performance assessments.
Or
- Taught students music for 10-minute marching band show.
I bet you picked number one, didn’t you?
I don’t know why, but people reading resumes love “legal-ese” even though no one in the room is a lawyer. I don’t know all the specifics about power words, I just know that they are important and that they should come at the beginning of the bullet point. For an excellent guide about power words to use click here.
General considerations
One page or less
The shorter the better, so to speak. If you have one page all on the front then thats great. I had to go onto the back page, which people hardly look at, so i keep my least important stuff the back. The stuff on the back is still important and shows a more complete look about me as a teacher, so thats why I keep it there; however, it’s not going to be make or break if no one looks at it.
Use bullet points (but not to many)
The rule of thumb that I am aware of is to include 1-3 bullet points to explain what you did in a role. So don’t just list that you had a job. List that job then brag about 1-3 major accomplishments from that job.
Reverse chronological order
This is standard across all resumes in all fields. Every section needs to be in reverse chronological order! That means that your student teaching experience should be first under relevant experience new grads! Unless of course you have a summer camp position that you will be working after summer camp.
If you have two positions that ended at the same time (two leadership positions in different organizations) then you would list the one that started later, and underneath it the position you started earlier.
Have someone else proof it… then ask someone else
When I made my resume for grad school applications I had my advisor look over my resume. He absolutely tore it to shreds and told me to edit everything and bring it back to him.
I made the edits.
I took my resume to him again.
And he tore it to shreds again. Then he said to take it to my research advisor (i did two different undergraduate research projects; she was my mentor for both projects)
I made the edits and took my resume to my research advisor.
She also tore my resume apart. Then said to make edits and take it to the instrumental head of department at my university.
So I made more edits. I took my resume to the third different professor. I waited anxiously as he edited my resume even more. He was correcting all of the tiniest details and making all of the edits using english language rules that I didn’t even know existed!
But he said that my resume was really good and that I needed to make the edits and take my resume to the university career center for one last look.
So I made probably my 5th set of edits to this resume. I would like to say it wasn’t bad to start with, but at this point I was so tired of worrying about formatting and punctuation and font size that honestly, maybe my resume did start out that bad.
I wouldn’t know how bad it was without these people because this was my first resume that I’ve ever written! Anyway, this isn’t the point. I made more edits. I took my resume to the career center on campus.
The career center lady said “wow this is a really good resume! Which of this stuff is from high school?” When i responded that everything in my resume was from college she was genuinely impressed. I presented her with a one page front and back resume that was exclusively college experiences. She had no notes, but she gave me a booklet with other formats to explore for my professional resume, and I have never been more relieved!

-
Canva in the Music Classroom

If I’ve learned anything from the state music conferences in recent years, it’s that music educators have to be our own press team. This past school year I became the PR team for the middle and high school in my district. I plan on offering my services to the elementary schools this year, but I haven’t made contact with those teachers yet because the end of the school year was crazy town!
In becoming the PR department for my own program and another music program in the district I learned a lot about writing a good newspaper article for our local news paper and I learned that I need to be more specific when I ask trip chaperones to get pictures of the groups while I retrieve scores. But that isn’t the point of this blog.
The point is to introduce you to the wonderful tool that is Canva. There are so may ways that Canva can be used by music teachers, or teachers in general. These are just a few of my favorite ways to use Canva in my job and I’m sure that you or I will find even more ways too!
Make Social Media Announcements
If you have a social media account for your band or choir then this will be really helpful when sharing information. We live in a very visual world, so making an immage to share an announcement will help catch your audience’s (your students’ parents) attention. Don’t believe me?
Think really hard about anything you’ve had to read on social media. Did you read the super long post from your kids school to get all the details, or did you just skim it for the key points? If you’re reading a blog post about how to fix something, do you rely on just the text, or do you use the pictures to help you know you’re doing the correct thing?
And this is a niche issue, but if you bought a brand new marimba with ESSER funds like I did, you were probably relying on pictures to make sure you put the new marimba together correctly because those directions were not great!

My point is, pictures are super helpful and they get the point across quickly. Use them!
I’ve seen directors create graphics for recruitment, band camp announcements, student shout outs, and to communicate with parents on field trips. The graphic above is one that I used to grab attention on a post that linked to a few local summer music camps.
There are so many great ways to use Canva for your social media announcements in your classroom.
Create engaging slides for announcements or content
I don’t know about you, but I like to have slides to follow along in my lessons to help me stay on track and help make sure that the lesson flows. If you want to avoid the boring slide presentation blues, then I would suggest Canva.
Canva has a ton of engaging elements that you can add to your slides such as animated arrows to point out important information. You can also upload your favorite countdown timer videos form YouTube and embed them into your slides. Canva has a few countdown timers, but there isn’t a lot, so I would still go with a countdown timer from YouTube.
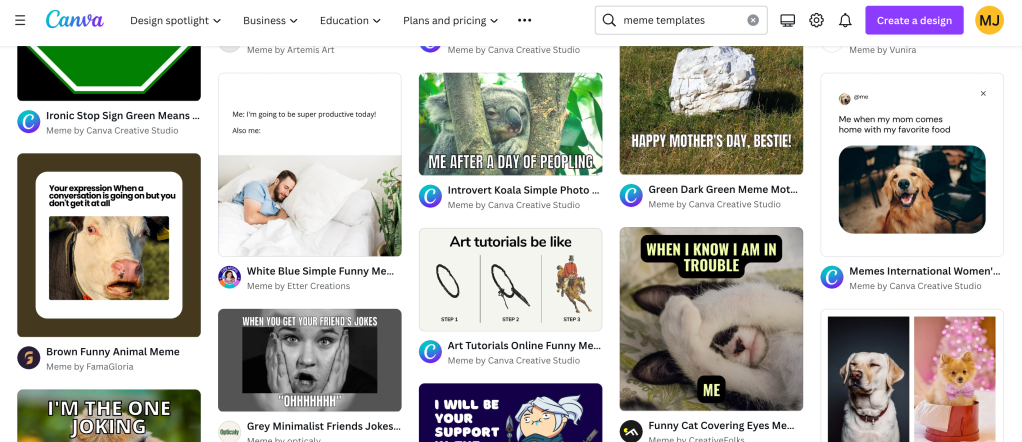
Create your own Meme Templates
This is super easy to do in Canva. All you have to do is upload a picture into a file for whatever size paper you’ll print the memes out on. Or your template should be formatted to fit the social media pages that you may have for your class. Show the students how to log in to Canva and how to duplicate pages, also show your students how to change the text in a text box. Then you’ll have tons of memes for all your meme needs.
You can also search for “meme template” in Canva, filter for free templates, and then let students edit them.
Make Reward Certificates
Canva has tons of templates for you to choose from where all you have to do is hit duplicate then type in names. You can even edit colors and fonts to suit your specific style or to match your school colors.
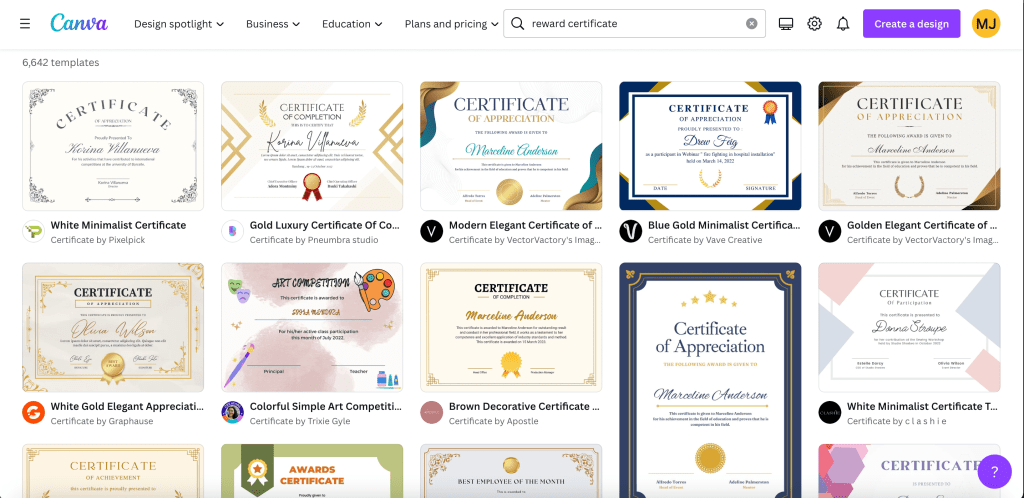
It also wouldn’t be difficult to make your own template in Canva.
Make concert Posters
I am still playing with this one because I didn’t make concert posters last year. And when I did make concert posters is was on an 8.5 x 11 with arial font and I only taped it in the front office. But I am committed to stepping up my game this semester and this is what I am drafting right now!
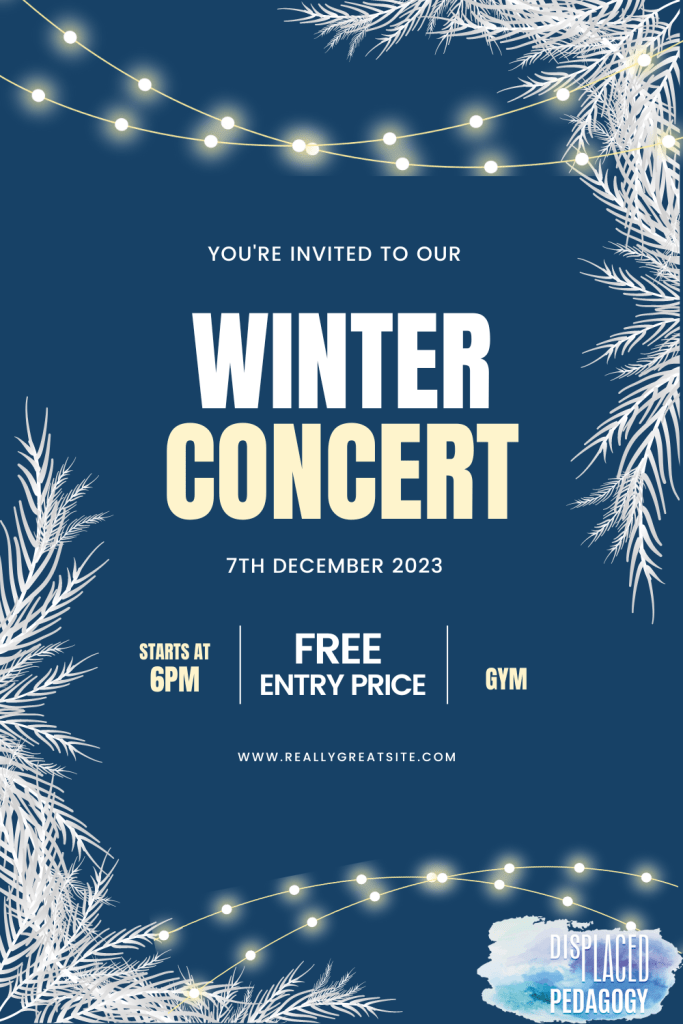
Its a little wonky because I had to resize it from its original size to make an image for this post, but it’s a HUGE upgrade from last years piece of copy paper. Also the concert poster wont have my business logo on it…
But once again, Canva has templates for these and all I did was type “winter” into the search bar and filtered out for a poster that I liked. I changed some information and BOOM, a beautiful concert poster for the winter concert that I made in June.
-
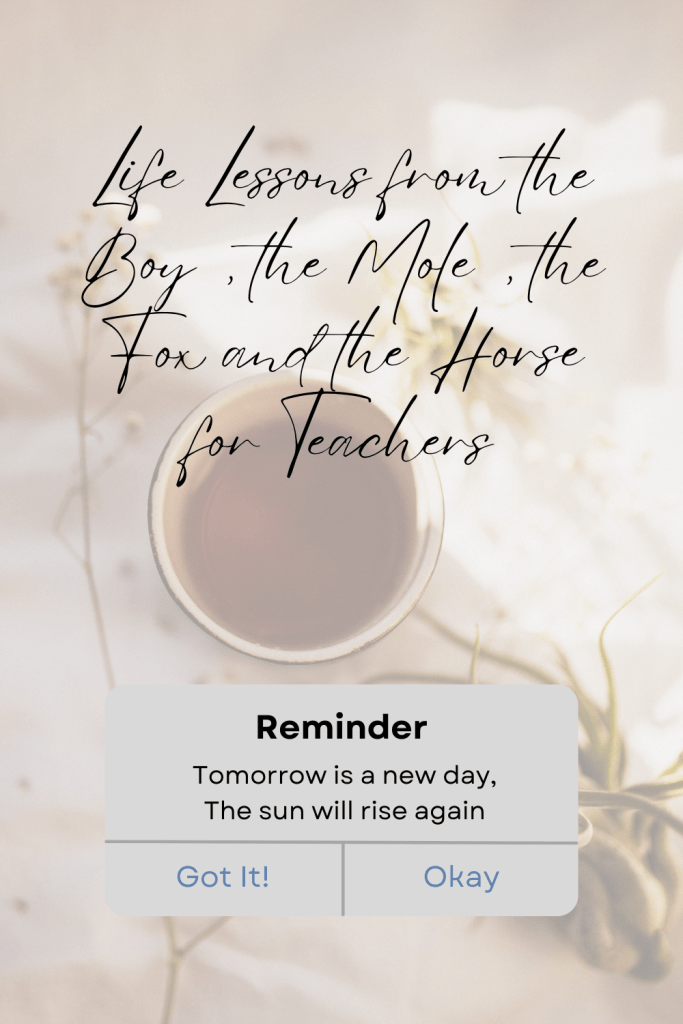
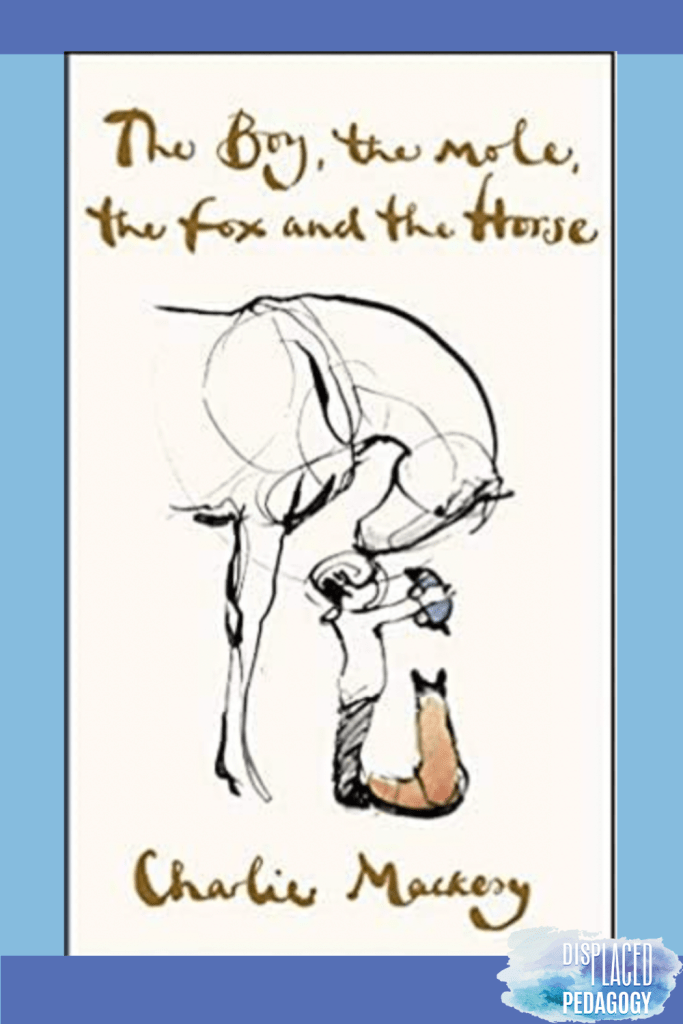
Life Lessons from “The Boy, The Mole, The Fox, and the Horse” that We All Need to Hear

Let me begin by saying that this is not an affiliate post, so if you decide to purchase the book I make no money. I just really love this book and want to share it with all of you, like I share it with my students.
“The Boy, The Mole, The Fox, and the Horse” was recently gifted to me by the mother of a close friend. She is the type of woman who radiates warmth and positivity and who makes you feel like you are being wrapped up in a soft, fuzzy blanket the entire time you are in her presence. She wrote a darling note in this book and I’ll be honest, I almost cried when I read it. I held back the tears welling in my eyes because I was at said close friend’s house kicking off the summer and I didn’t want to be emotional.
As I am writing this I have shown a few other close friends the book and have been showing certain students pages that they need to see. So yes, it is summer break, but I am working at my school’s summer school and I see a lot of my students there because they don’t want to be at home.
The book by Charlie Mackesy centers around a boy who asks lots of questions and a mole who likes cake. They journey together and find a fox, whom the mole frees from a trap at the potential risk of his own life. The three later find the horse, who is very comforting to the trio.
Mackesy uses a messy style to this book. Nothing about the book is pristine or perfect as nothing in life is. At one point Mackesy incorporates some mess that his dog made walking over the pages and a tea stain into the book.
Asking for Help is Brave
This past year was the first time I ever took my band students to our local performance assessment. I read all the guidelines and all the rules before we went and I was positive that I knew every little thing that would happen and that I had prepared my student effectively.
Then came sightreading.
Now don’t get me wrong, I had been practicing sightreading with my groups and I knew that all of my kids could sightread confidently. But I misinterpreted the sightreading regulations for middle school band. We were going as class A (the class for beginners in their first year) and the regulations quite literally said “very easy.” My interpretation was that it would be a unison line from the back of a method book or something in the same range.
However, they meant “very easy” band literature. All the grade half music from JWPepper is class A essentially. They were not prepared for that and we didn’t do as well as we could have. But if I had just asked a more experienced band director who has taken plenty of groups to assessment then I would have known what to actually expect and I would have prepared my students better. I didn’t ask for help because my ego got in the way and it never occurred to me to double check with another teacher because I was afraid of looking like an idiot. But it costed my students greater success.
The Truth is Everyone is Winging It
I remember grading student work my first year of teaching. My thought in the middle of grading this stack of work was, “Who left me in charge of this?” “Why am I allowed to assign student grades?” “Am I really capable of making a curriculum and teaching the kids something about music that they might remember?”
It wasn’t until a year later when I was talking to my teacher friend in the front of the building that I discovered it wasn’t just me that had this feeling. He had that feeling too! A wave of relief washed over me as I realized that I wasn’t the only teacher in my building that felt like I had no idea what I was doing.
I think this is a great life lesson to learn because the truth is that none of us, or our students have any idea what we are doing. You don’t learn what you’re doing until you’ve had a lot of opportunities to figure it out.
I finally feel better about most aspects of my teaching practice and I aim to keep improving on certain areas each year.
Comparison is the Thief of Joy
Too often we get lost in the sauce of competition. We see our groups get proficients and other groups are getting distinguished ratings. The director in the next county just received a huge grant for instruments, your teacher friend in a different state got a new sound system for their program, and your middle school colleague just recruited one third of the incoming class into their ensembles classes. Whatever it is, teaching music will always feel like a competition.
If you keep comparing yourself to the teacher down the road or across the state, then you’ll never get to revel in all the fun and wonderful things that you’re doing right in your classroom with your students.
Focus on What is in Your Control
Deadlines, concert dates; all of these things are largely out of our control. However, we need not stress over all the deadlines and instead focus on what we can control to prepare for those deadlines. The chips will fall where they may at the end of the day and all that matters is that we tried. Directors, we need to focus on making sure students are having a good time while we have them chase for success or they will not come back to us from year to year.
In order to remedy the concert prep stress and make sure students still have fun I recommend making rehearsal plans for your concert pieces and unit plans for the musical elements you have to teach. A well executed plan will always be appreciated by your students even if they don’t know it. You’ll enjoy the plan as well because it’ll give a purpose to each of your classes instead of the typical listen and react model. (There’s nothing wrong with listening and reacting, but I am a firm believer that it shouldn’t be what you do every day).
Focus on what you can control to reach the outcome that you would like.
-
How I Organize My Teaching Materials

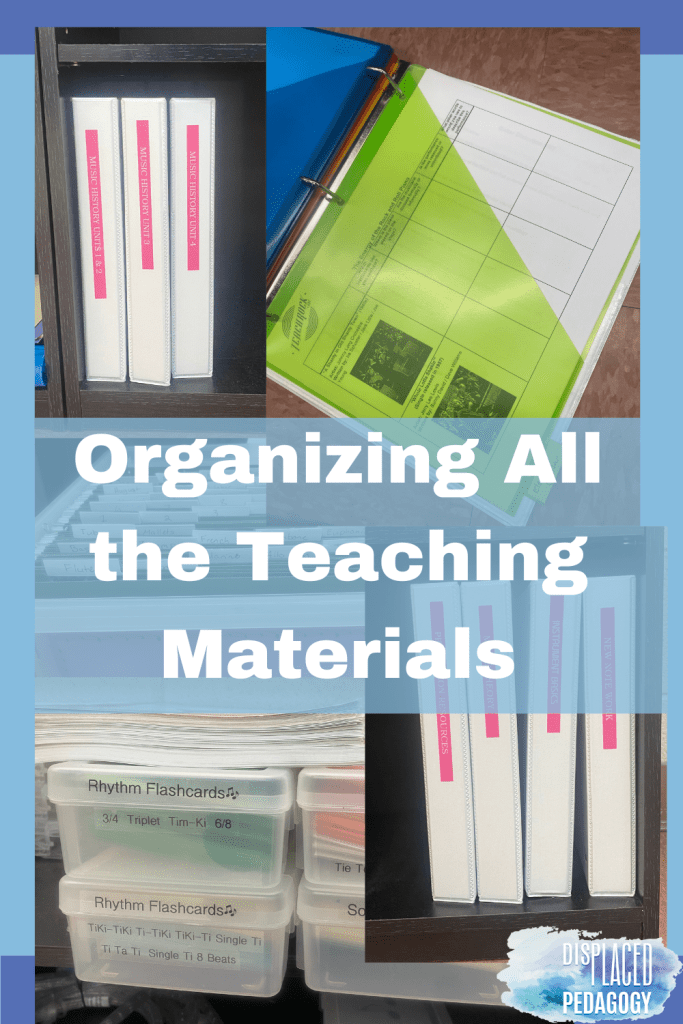
If you’re like me and teach all the things then you definitely have a lot of “inventory” in your classroom. It’s taken me well into my third year to figure out how to organize all of my stuff so that I have a more functional classroom, so today I am sharing how I organize all the things so that you hopefully don’t take as long as I did to get organized.
Binders
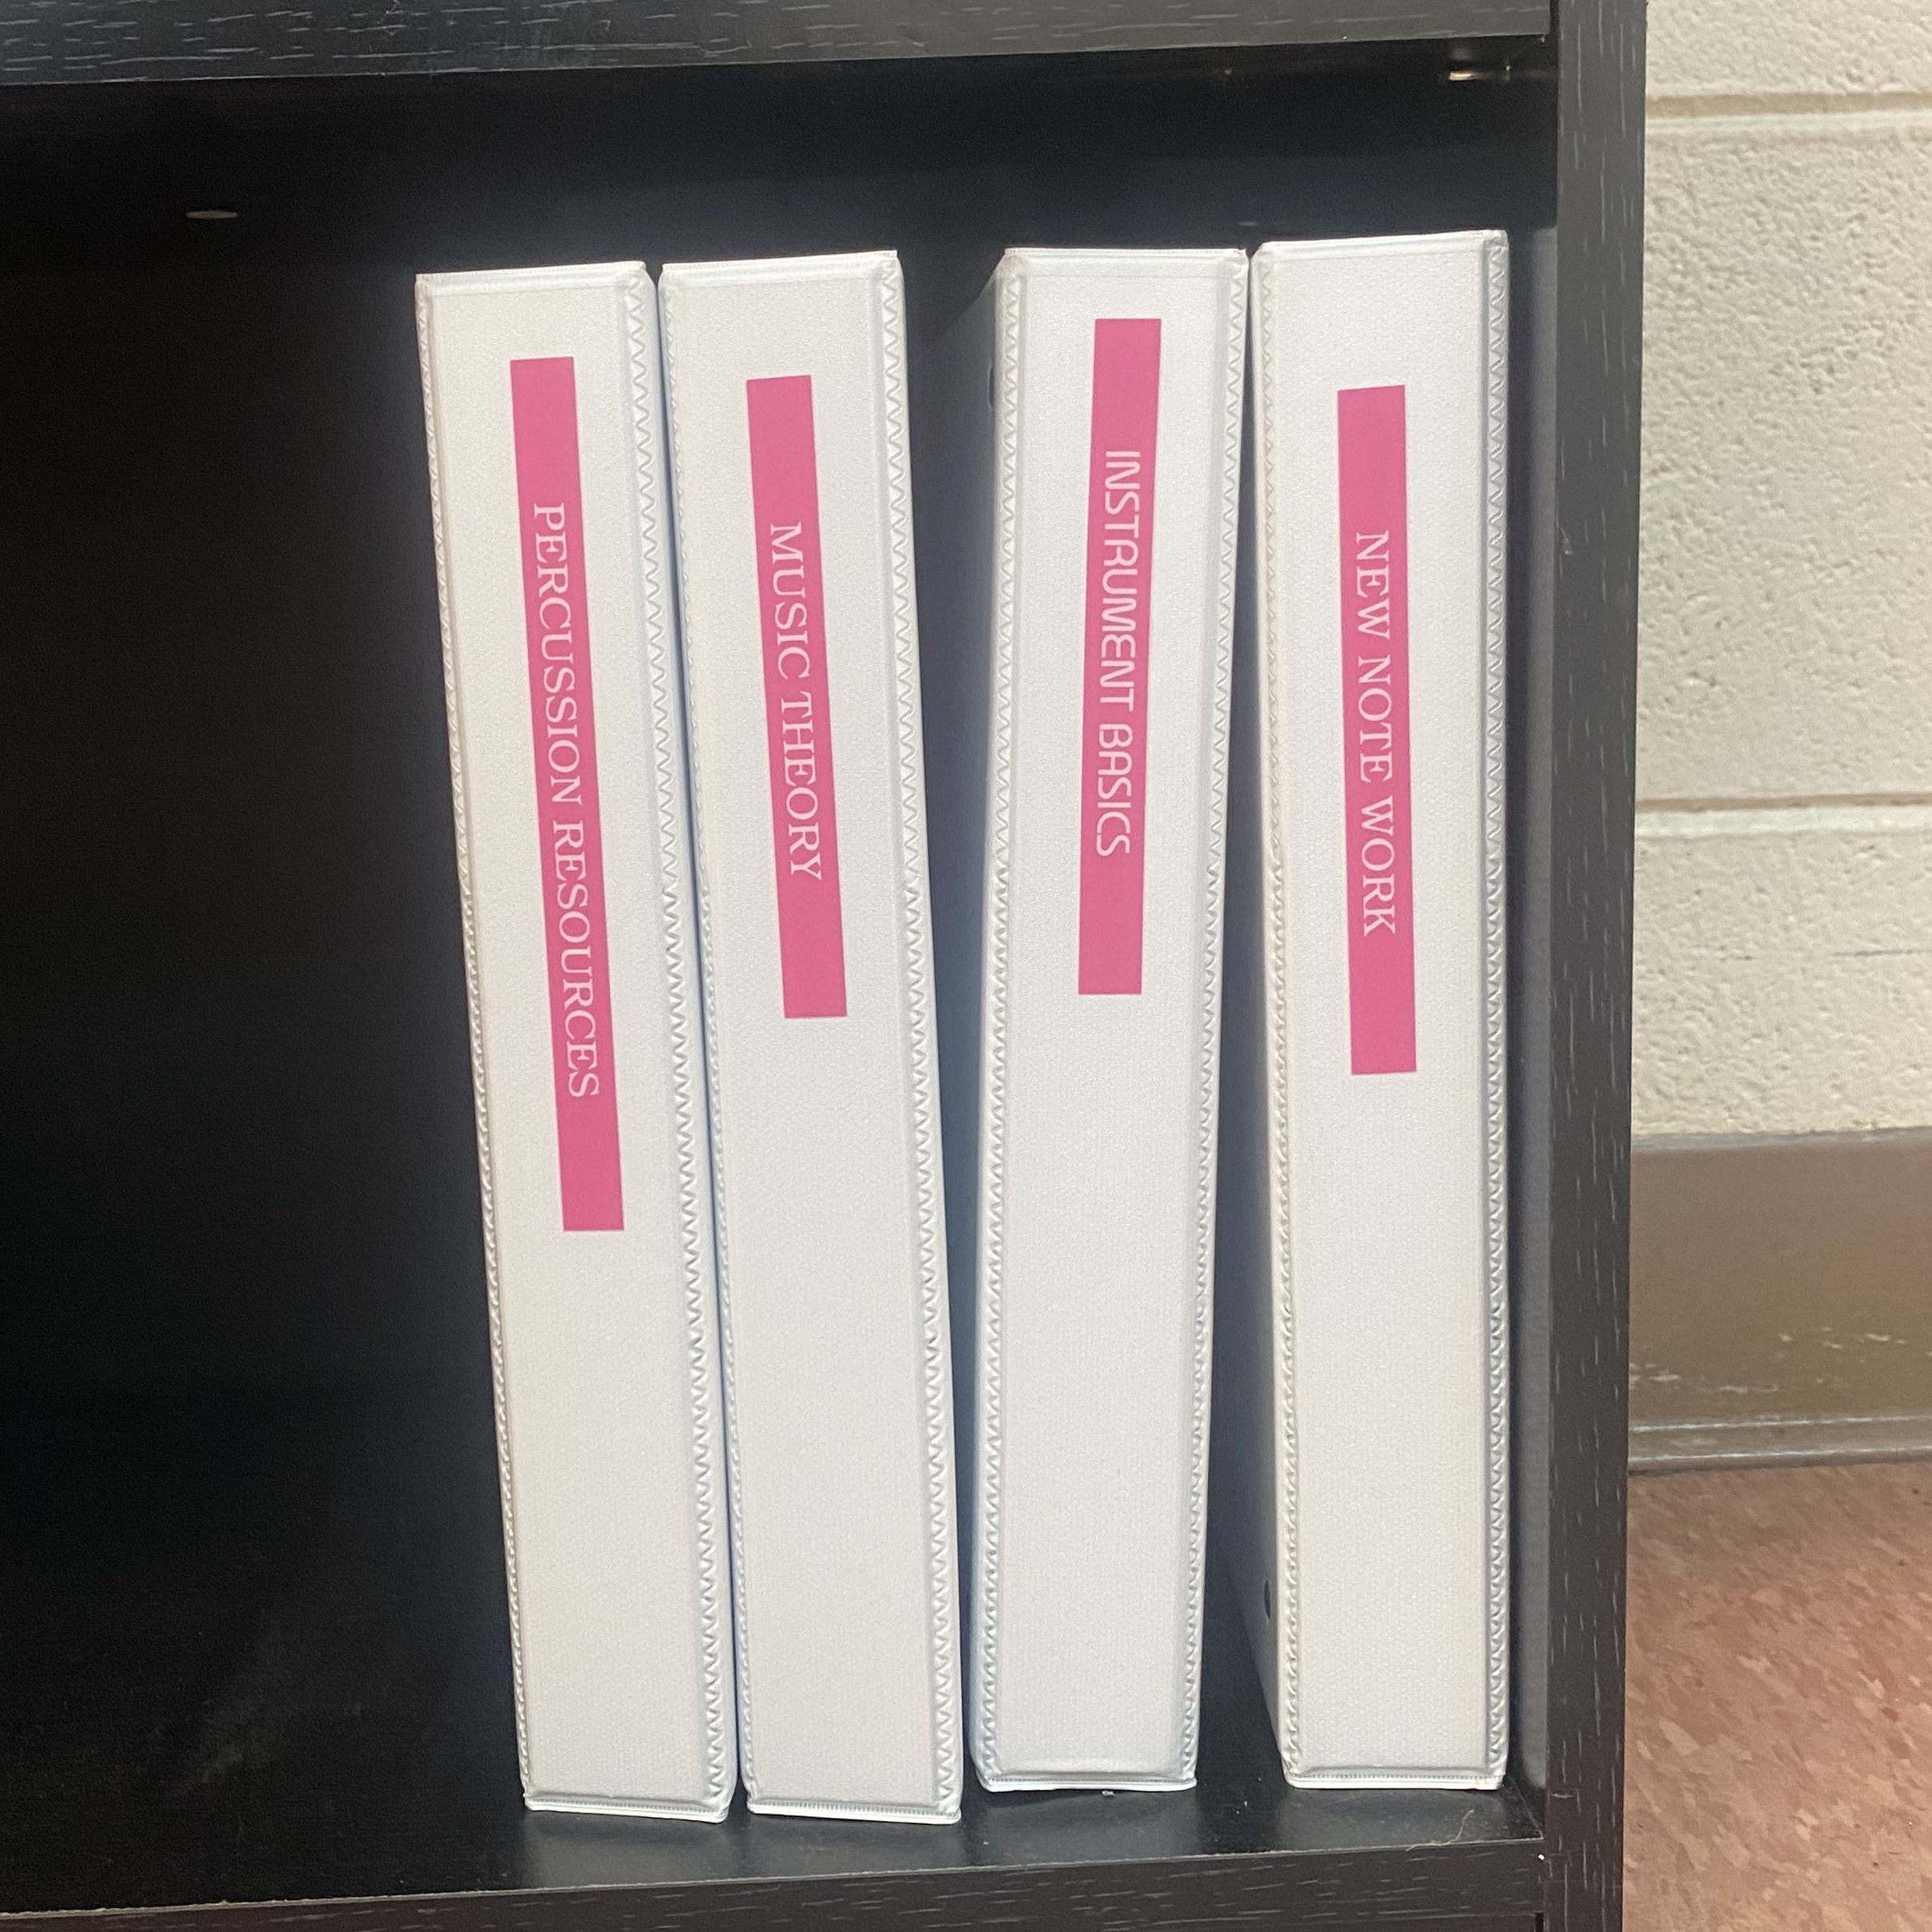
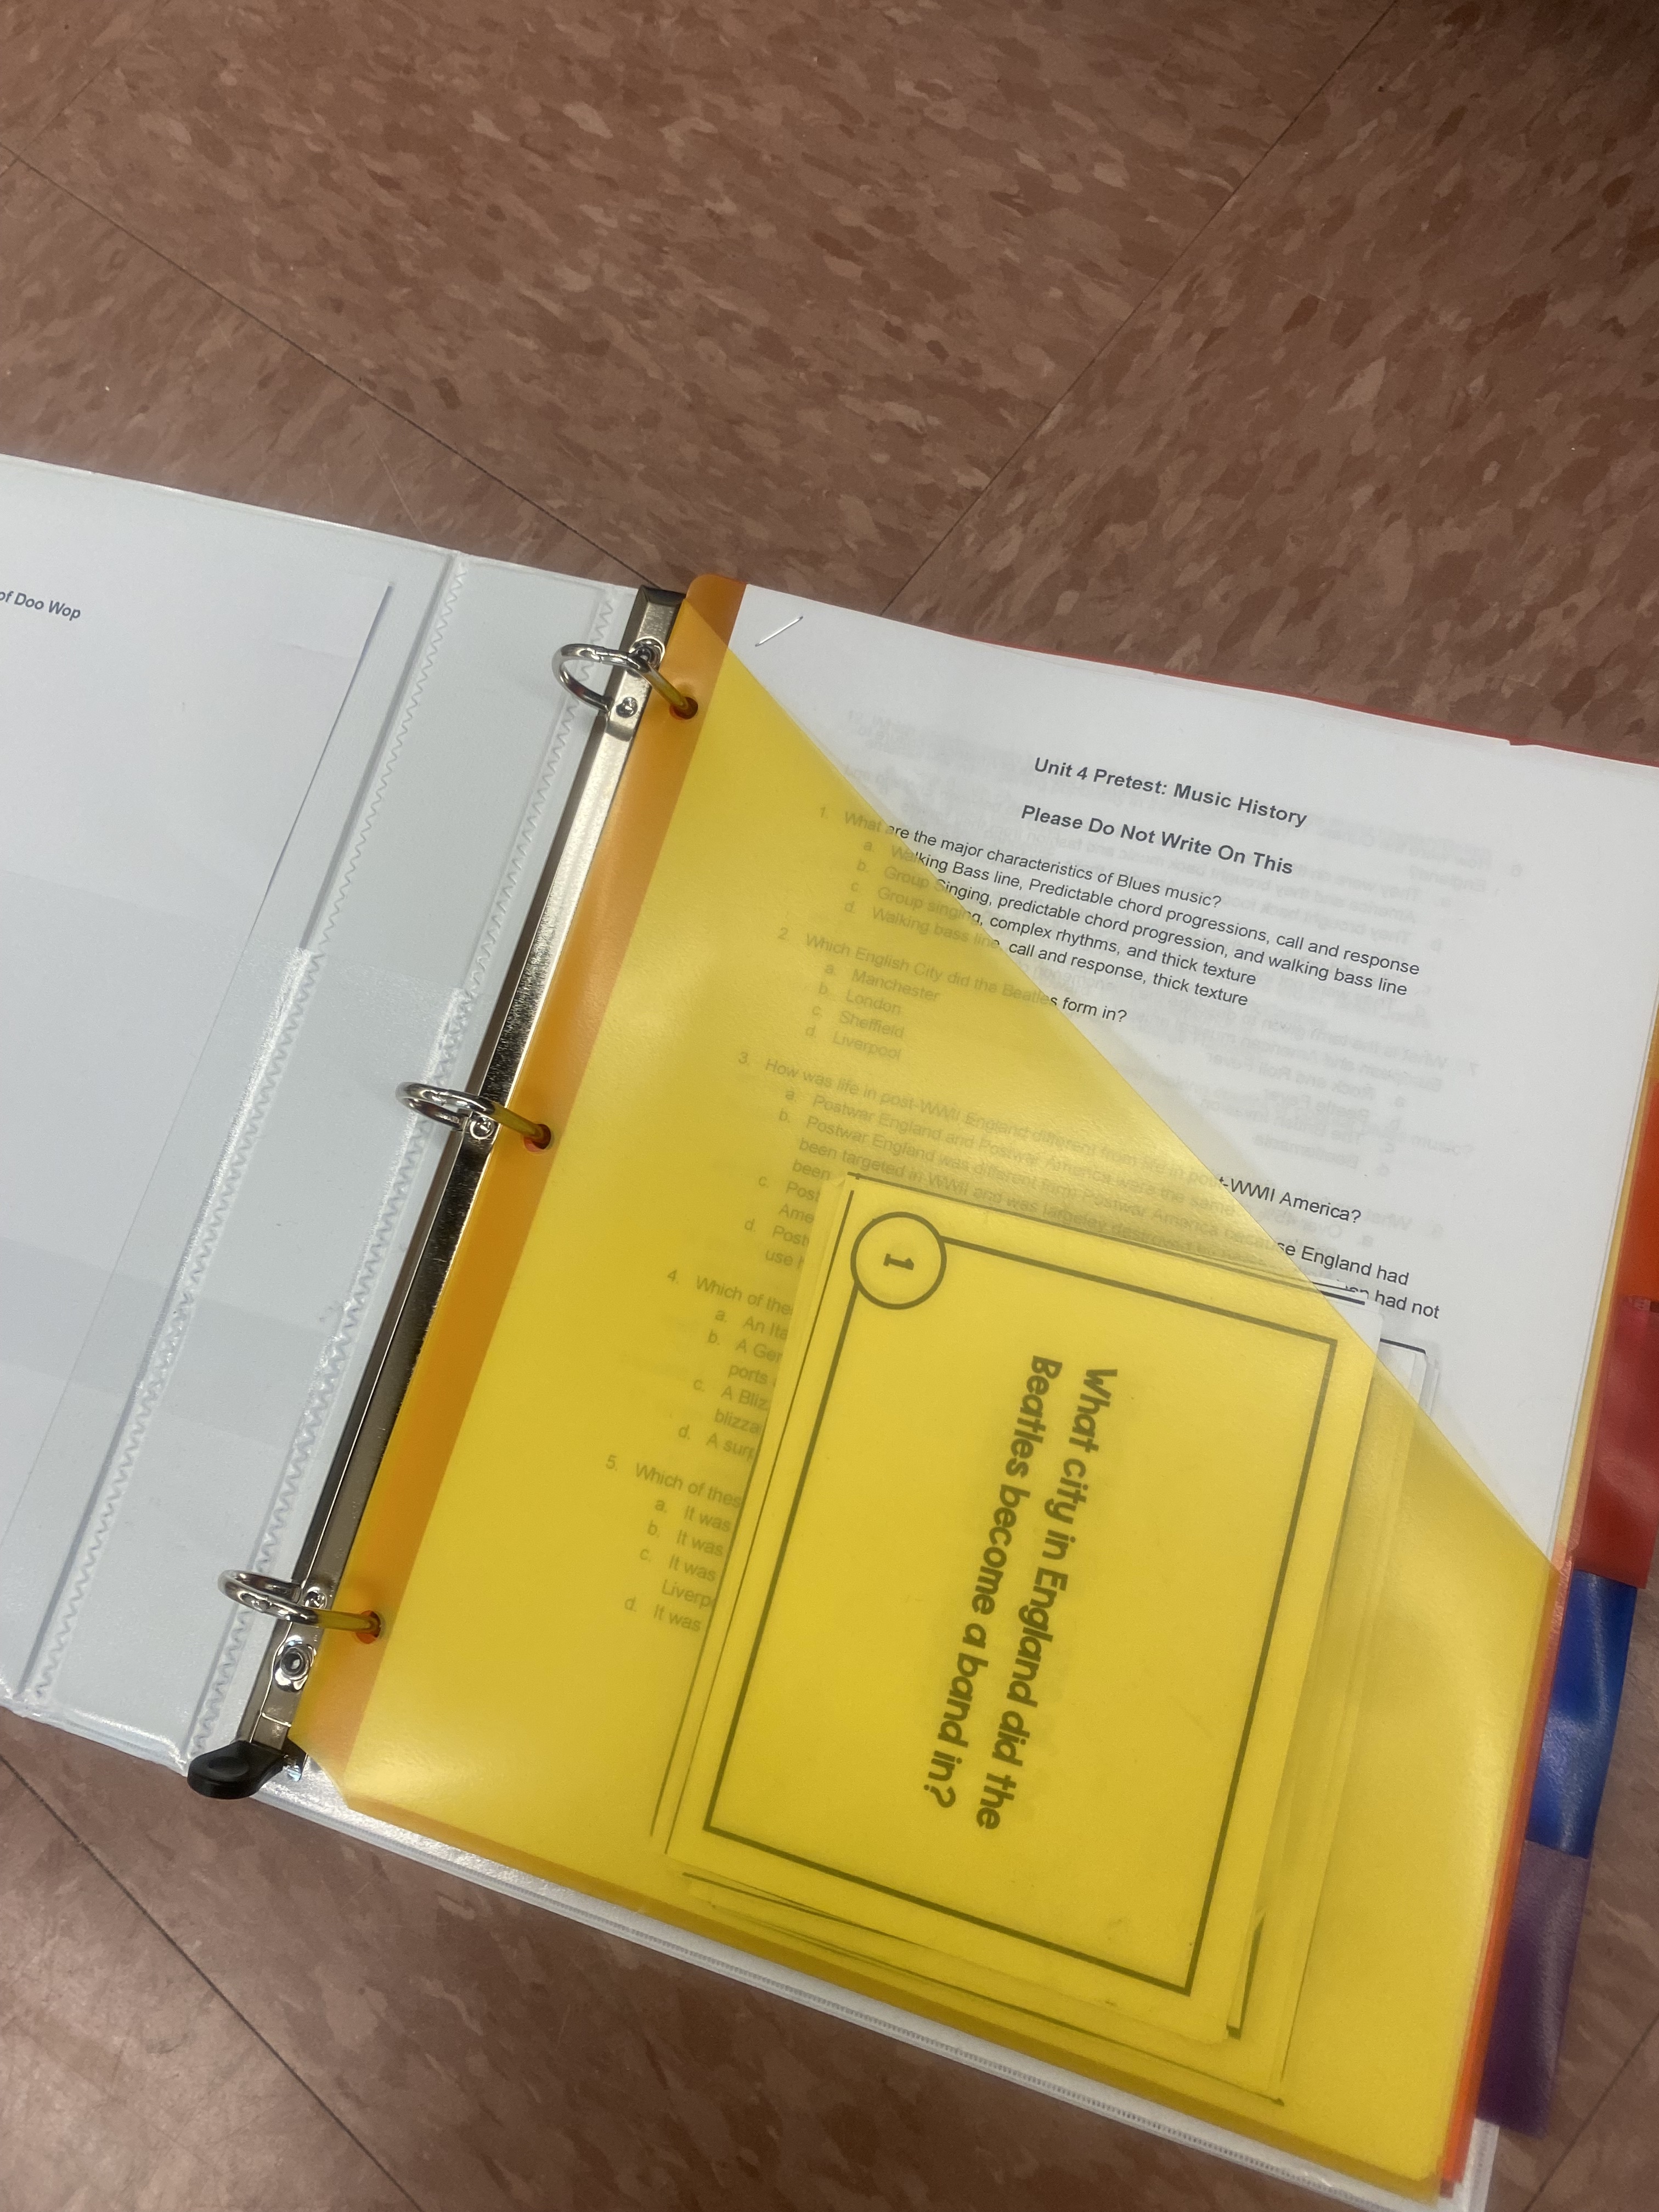
I have recently found out that binders work the best for me to organize papers that I give my students and worksheets that I use. In each binder I have tabs to help organize into smaller categories.
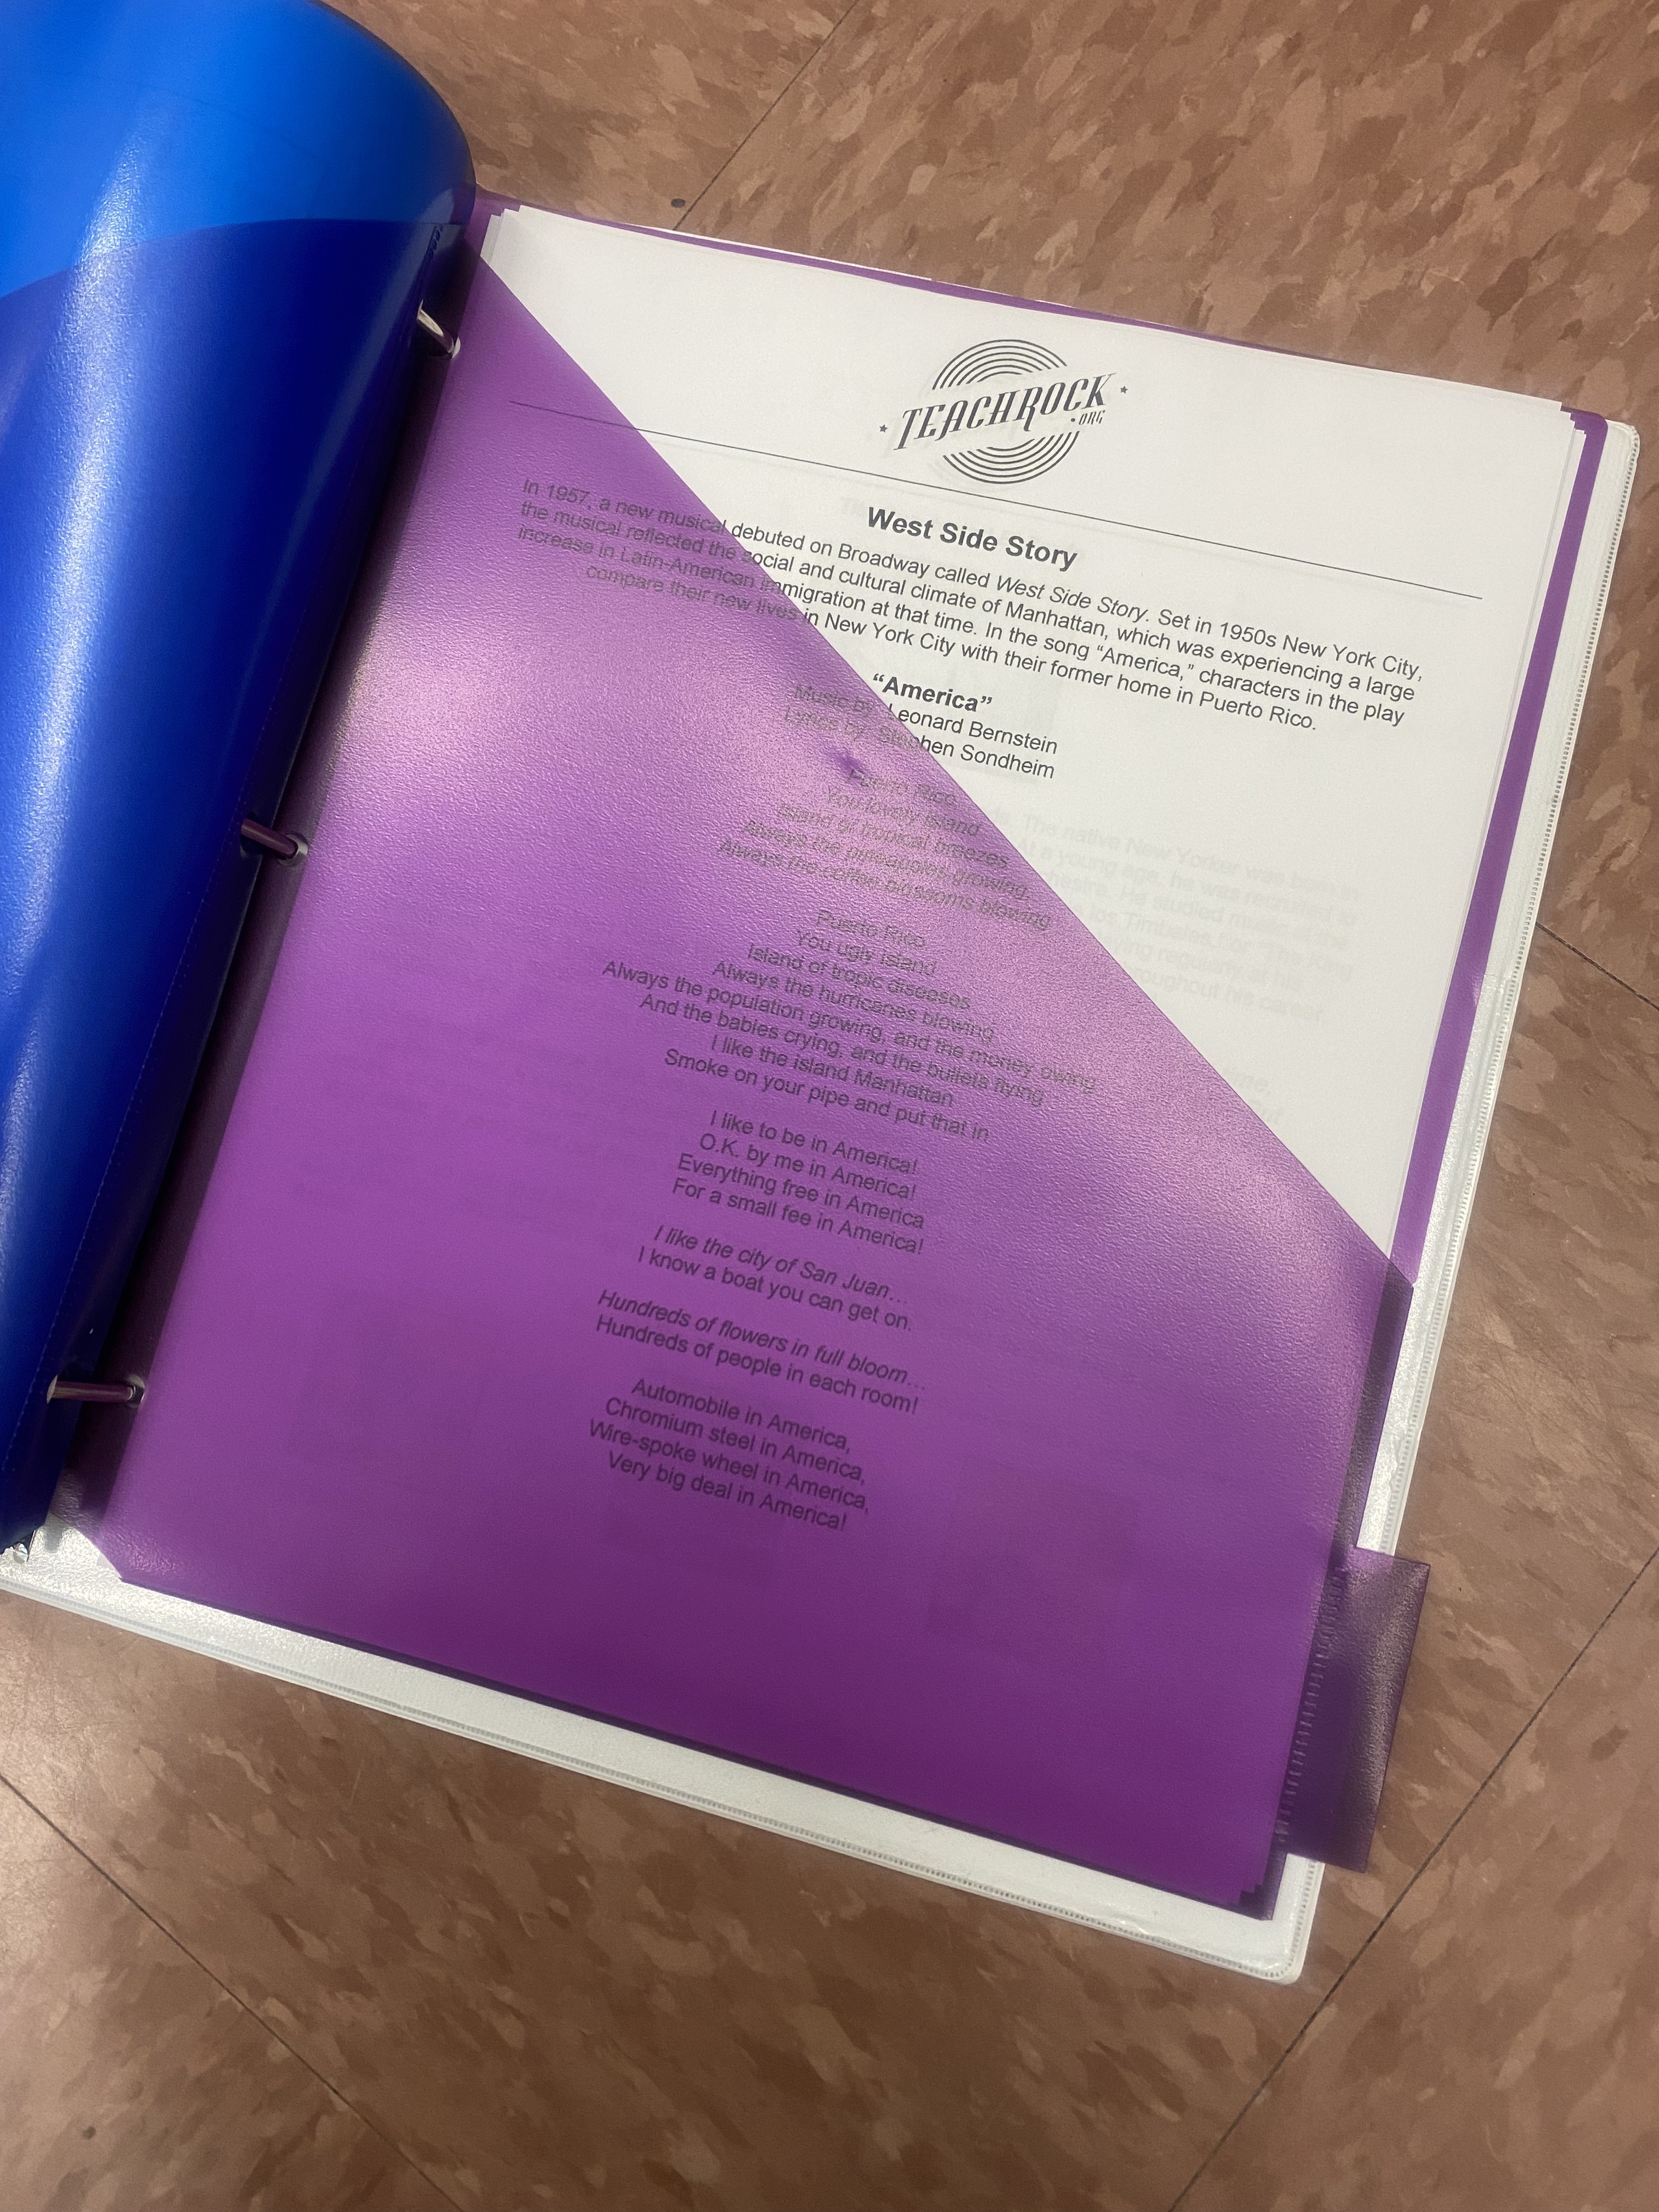
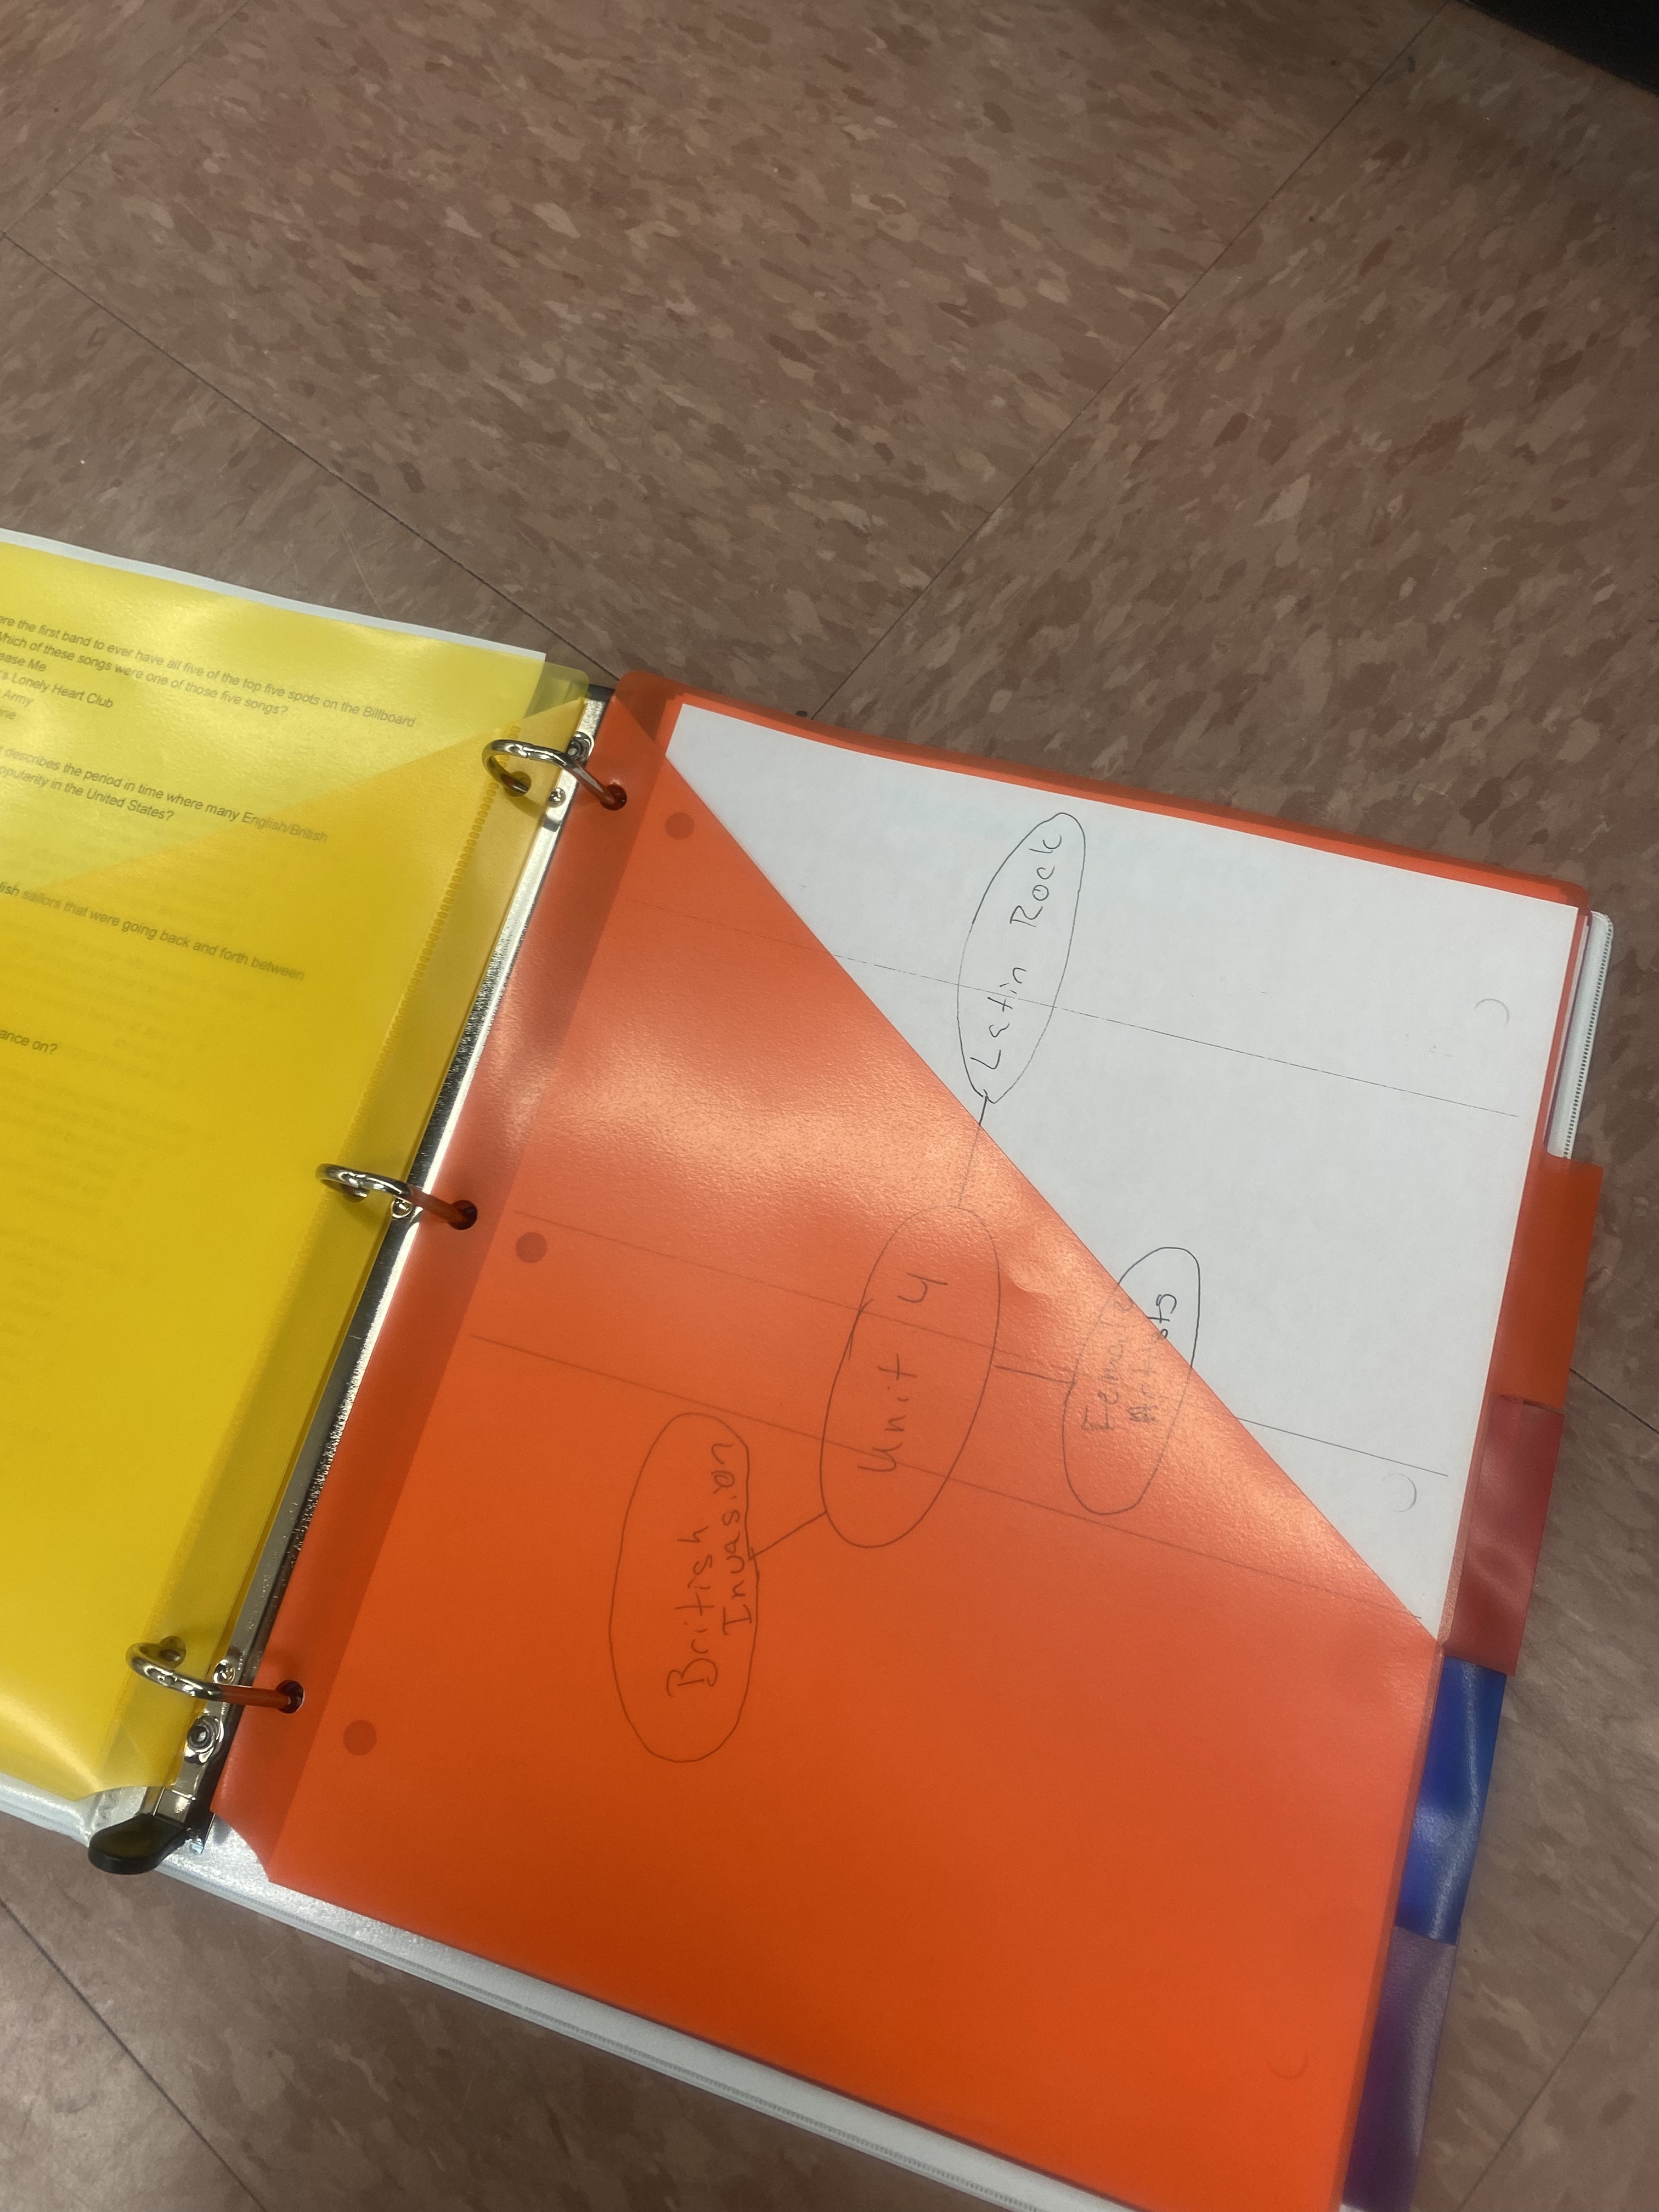
My music history binders are organized into units with each tab being labeled as tests and quizzes, unit long documents (mind maps, KWL charts, etc), then the tabs are labeled with general topics during the unit. I am using the dividers with pockets so that I don’t have to hole punch pages or bother with page protectors. It’s a super fast and easy system.

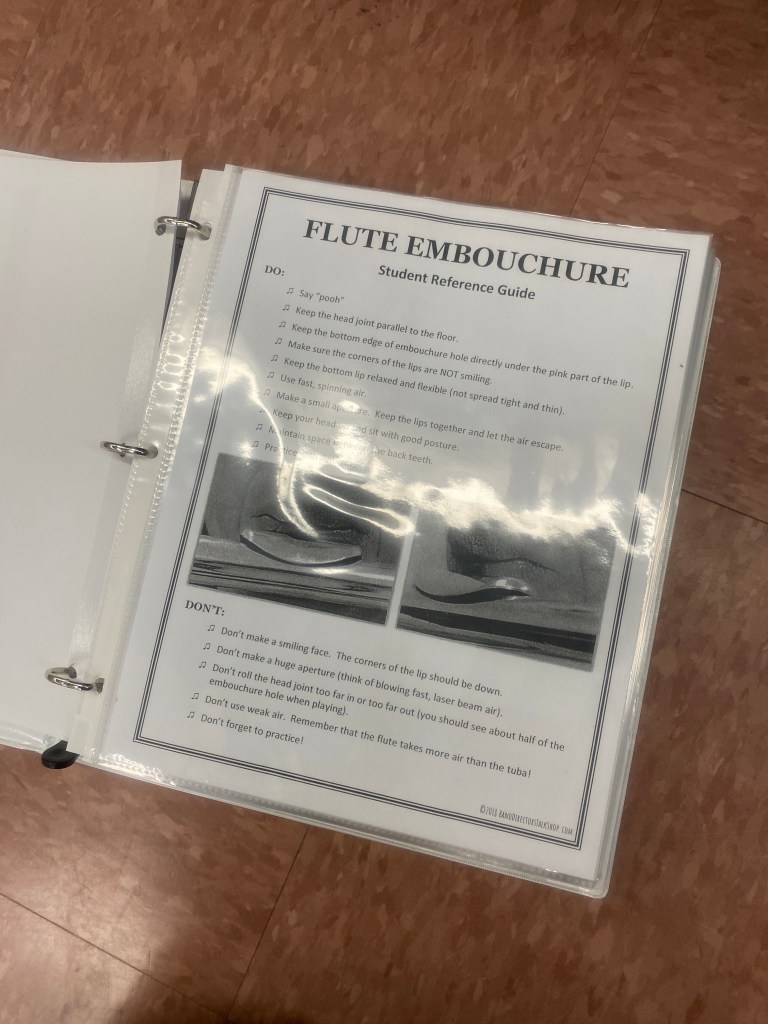
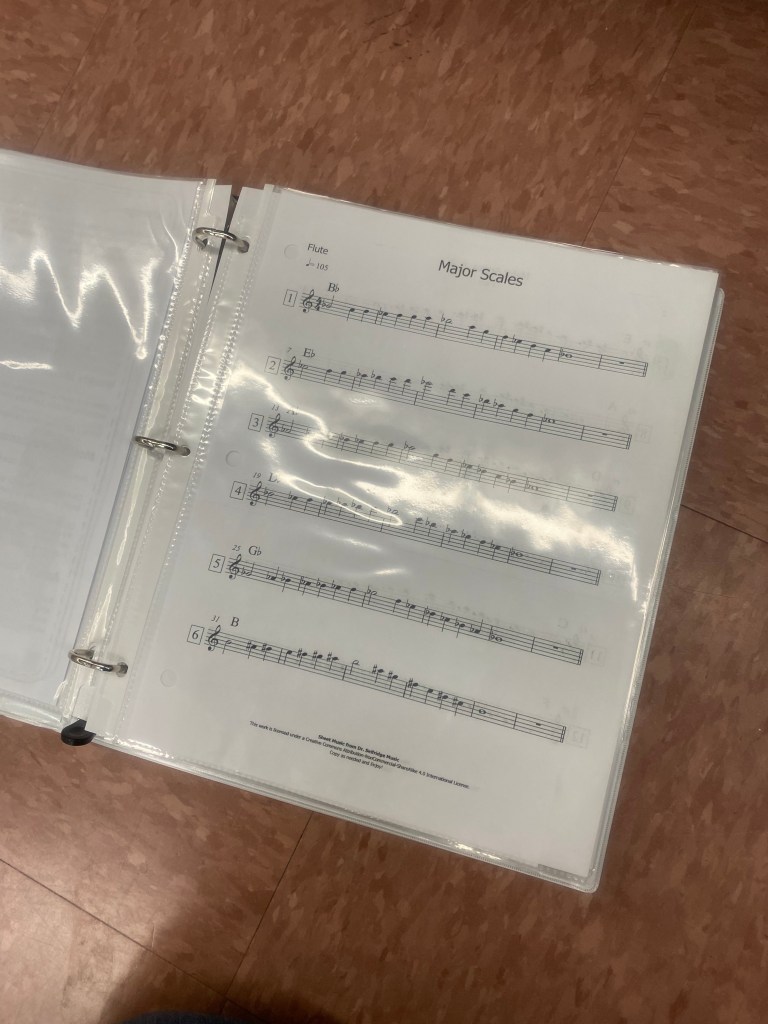
The binders that I keep for band and choir are organized in a few different ways. I have a binder called instrument basics where I keep master copies of the handout that feature care and assembly information for each instrument. I also have embouchure formation and major and minor scales for each instrument and rudiments for percussion.
Choir curriculum is mostly contained within the realm of music theory, so most of the handouts I use in choir are in the music theory binder. I keep pretests, midpoint quizzes, and summative tests in each tab as well as bell works, exit tickets, assignments, and guided notes. These will also get used by the band students, but I tend to follow the band book a little more closely and pull assignments from the music theory binders that will suit the band curriculum.

I also have a binder for things that are very specific to the band and the percussion sections. Again, these binders contain all tests and quizzes, notes, and assignments.
Ruler Boxes
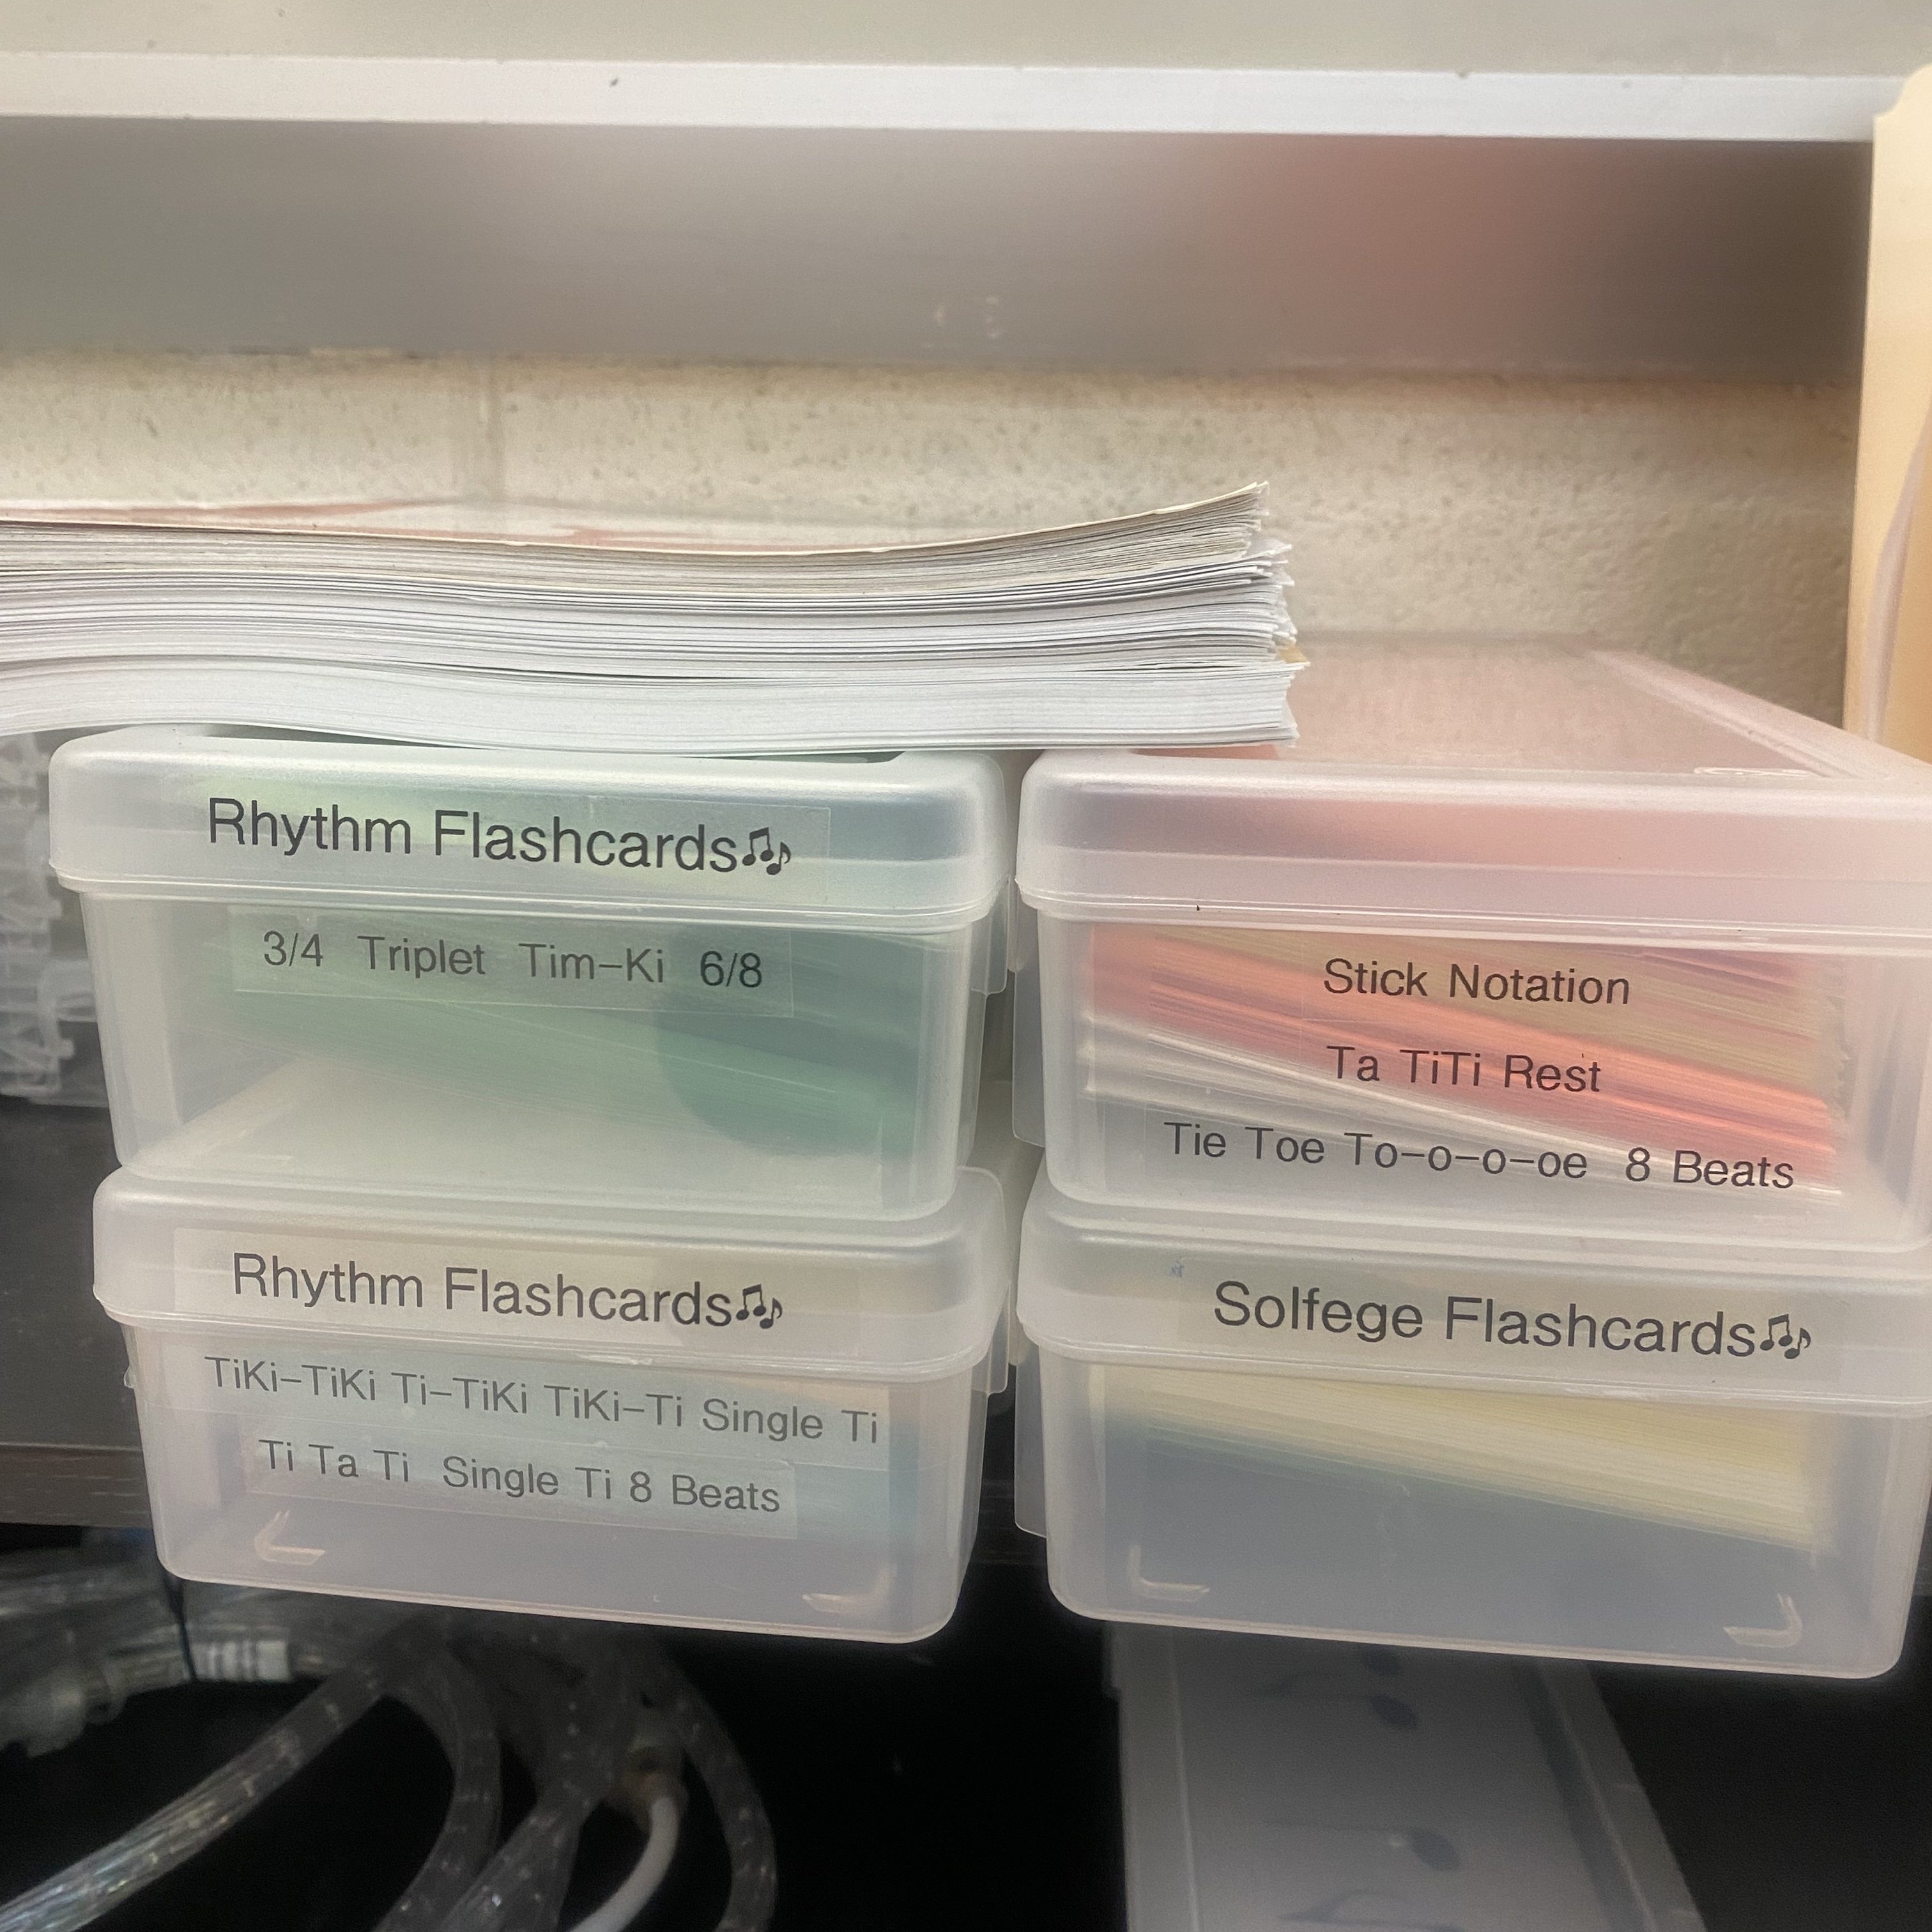
I LOVE these Iris Ruler boxes for flashcard storage. When I was initially job hunting I thought I would be traveling between two school buildings because I had applied to a few jobs where that was a requirement and one job was very interested in my application. Alas, I am thankful that I only have to coral my stuff in one room. However, I do teach all the things, so I have A LOT of music flashcards.
These boxes are the perfect dimension for half page music flashcards. I have all my flashcards laminated and separated by time signature or rhythmic content. I only have one box of solfege flashcards right now, but I have some ideas how I can make a set of flashcards that is more suited to the needs of my students.
I haven’t been able to find these in a physical store, but I you can find them here on Amazon. You might have some luck at Michael’s or another craft store, but I don’t live close to either.
Crayon Boxes
I don’t actually have crayons in my classroom, but I do have things stored in crayon boxes. These little boxes were the perfect size for my solfege and notename dots that I bought from David Row. You can get these manipulative in his Tpt store here. If you have any other small manipulatives for then these would also be a great item to pick up!
Plastic Dressers
I literally walked around Walmart for ages with a set of mallets trying to find something that I could house all the mallets and drumsticks in for over an hour. I was hoping for something smaller or more compact, but I truly couldn’t beat these plastic dressers for mallet storage.
The wide ones are the best for anything that needs to be stored that’s a similar length to a drumstick or you could add a small section inside the drawer to store other items. I use the smaller dressers to store all the reeds my students will need for their instruments.
I don’t currently have pictures of this area of my room because it is a complete disaster. I keep all the reeds and stick behind my desk so that kids don’t and can’t just access them all willy nilly. But I do have these exact dressers that are linked here and here.
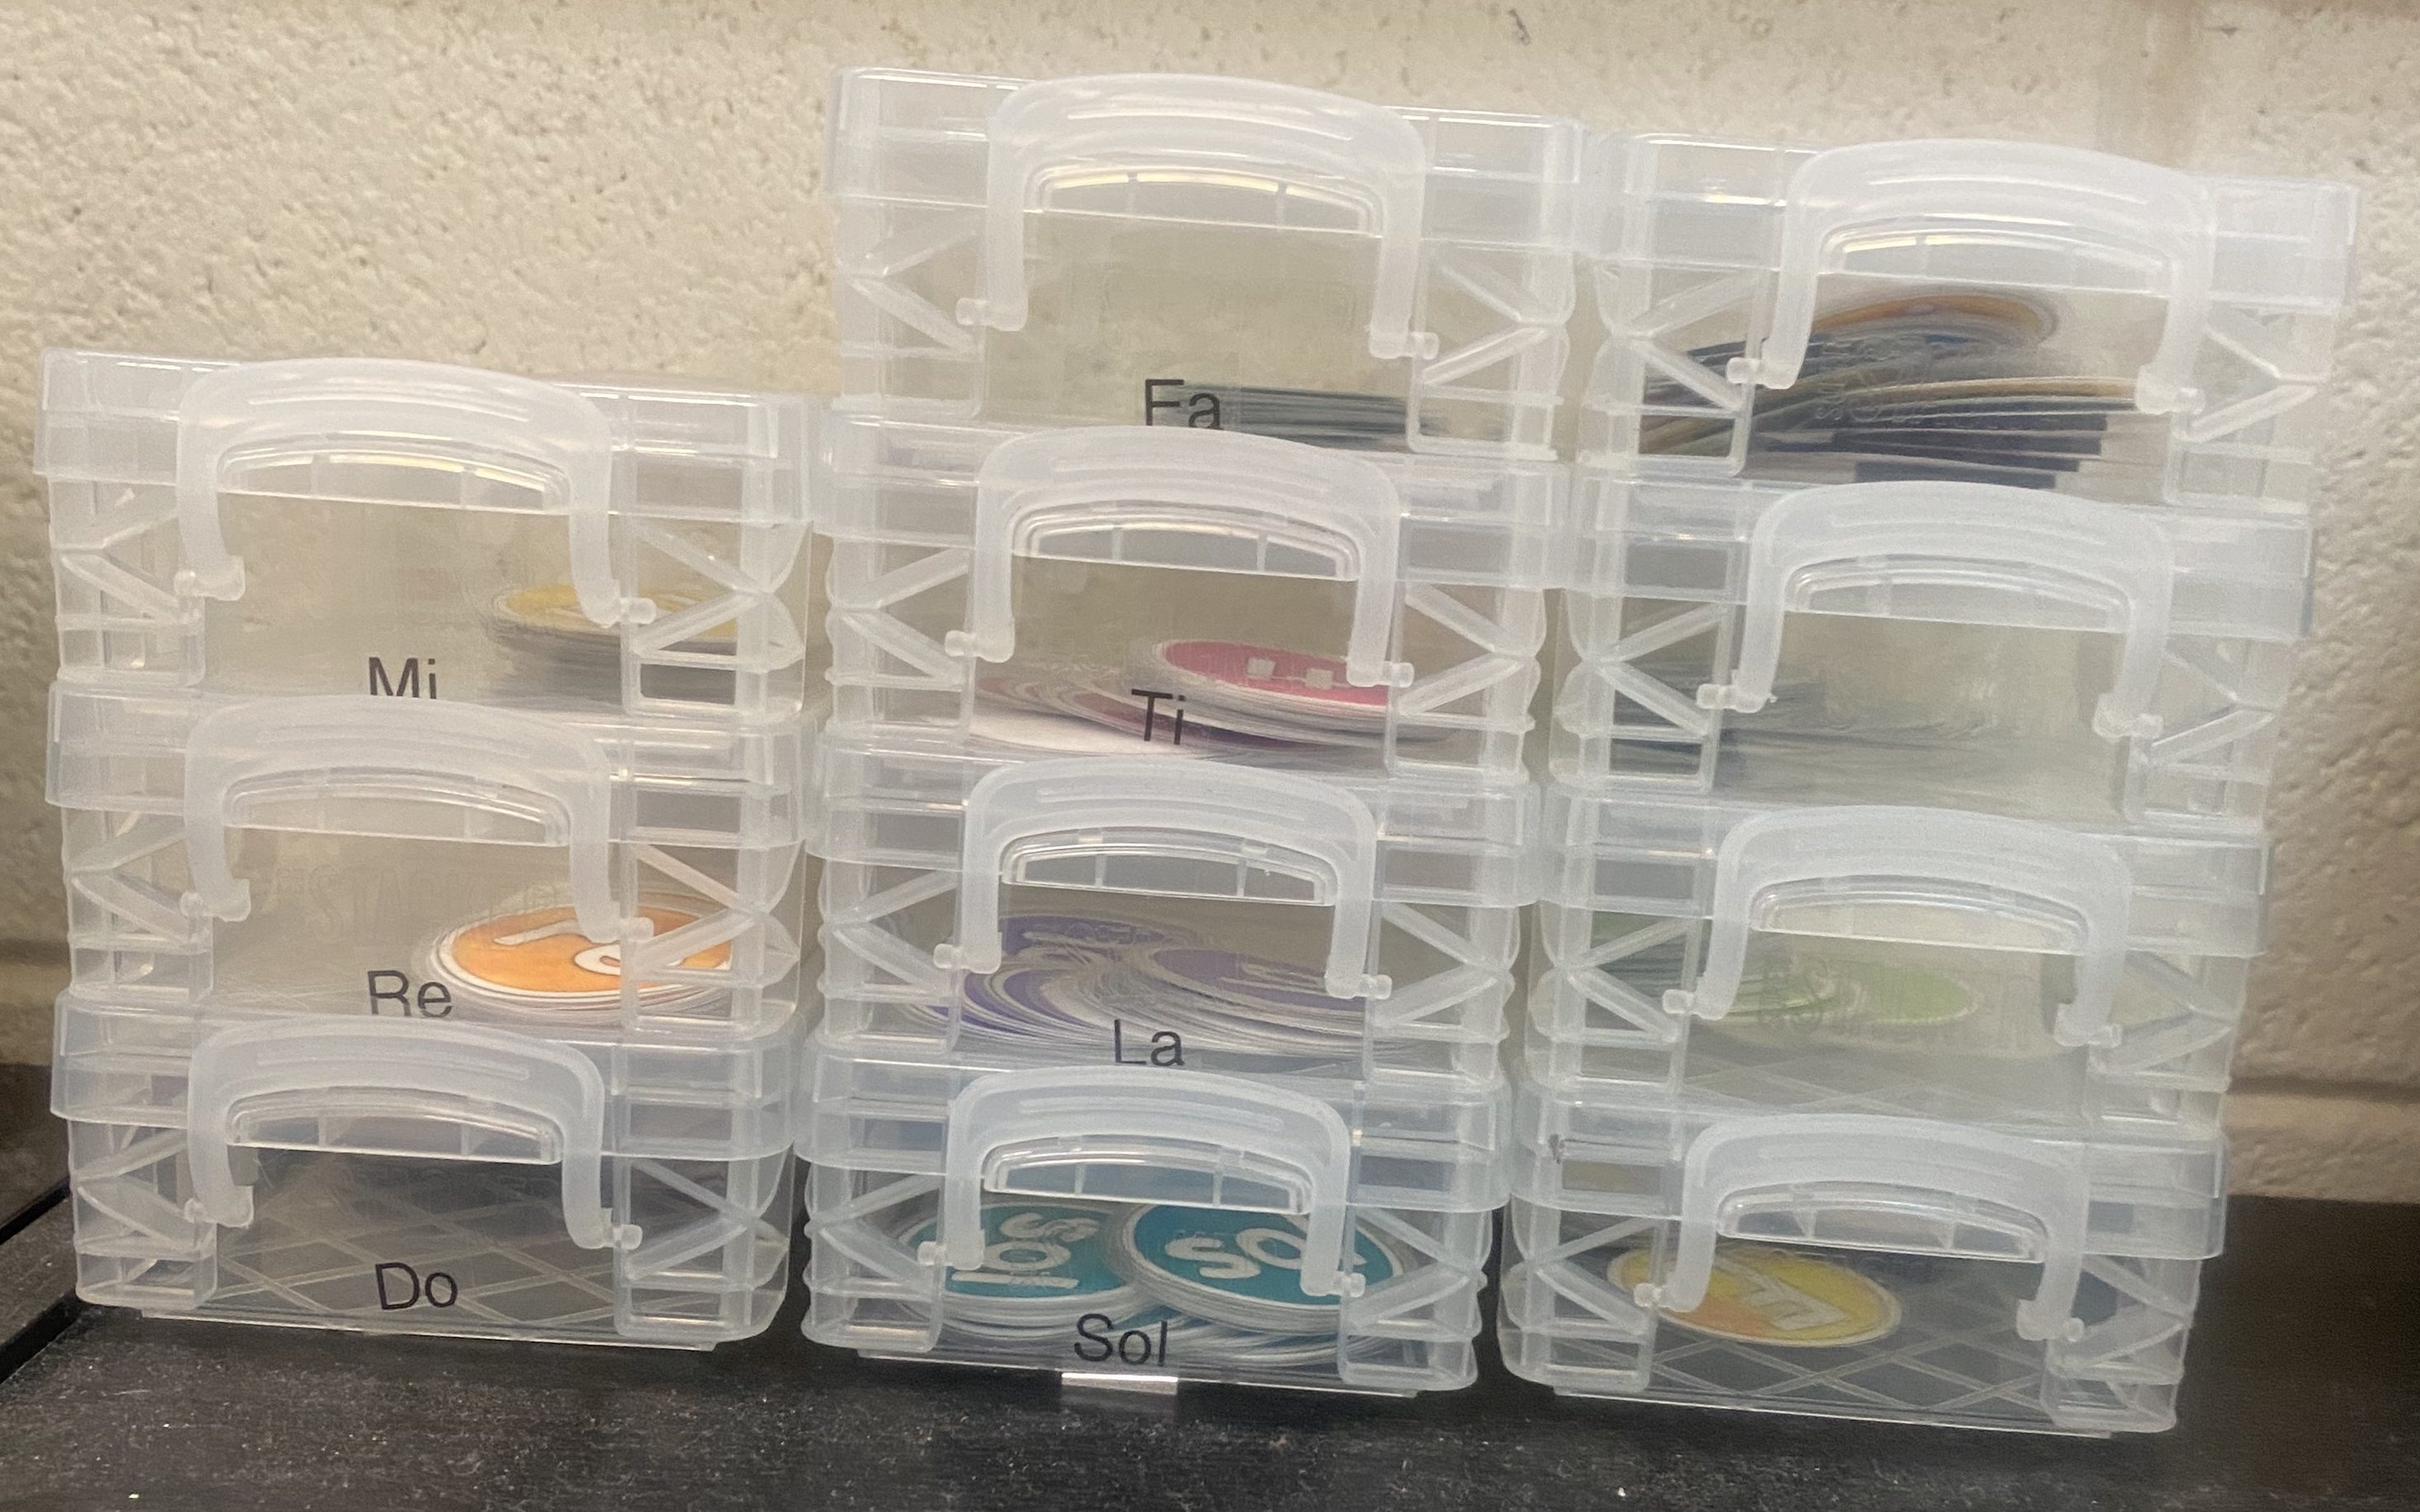
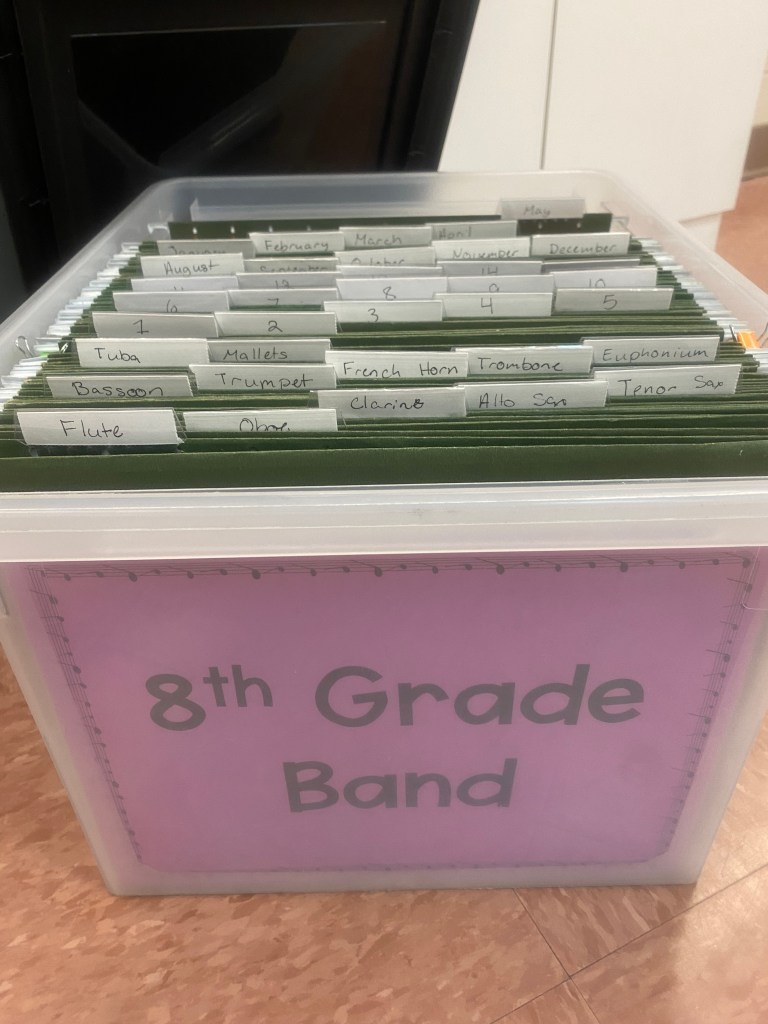
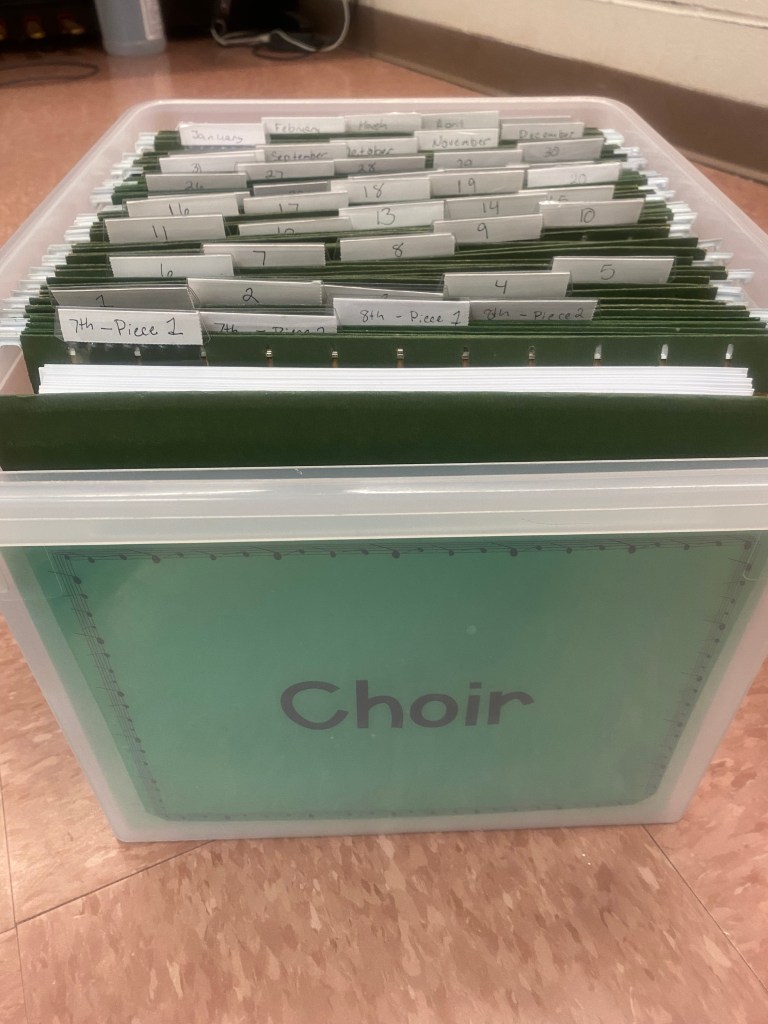
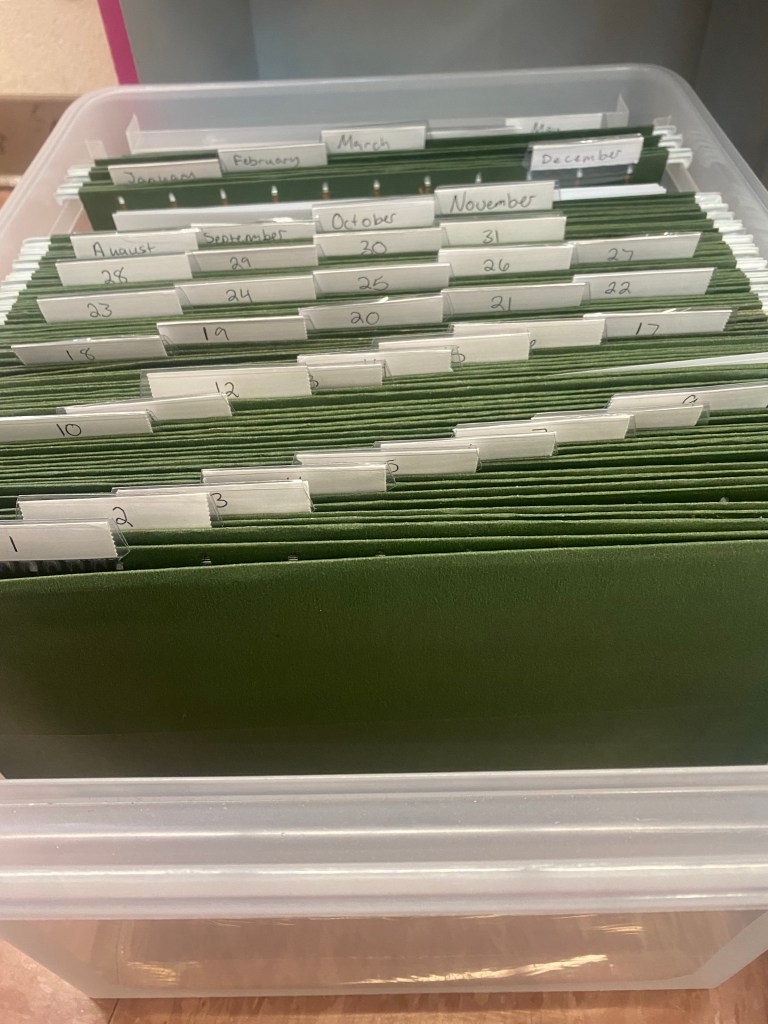
Hanging File Boxes
In my classroom I uses these awesome Sterilite hanging file boxes to keep extra copies of work around for absent students. I labeled hanging folders with numbers 1-31 for the days of the month and then I also labeled one folder with each month of the school year. With this system I am able to keep extra copies around for an entire month! At the end of the month I just place those copies in the folder of the previous month and we start fresh. In COVID times this has been very helpful, and it’s still helpful during cold and flu season. I wish I could say that this was an original idea, but I stole the idea to label the folders this way from Bridget Spackmen of the Lettered Classroom. She uses this idea to stay prepared well in advanced.
I keep one of these boxes for my general music class, and I have one for band and choir as well. The band and choir boxes have the same folders for the days of the month and the months of the year, but they also have folders for pieces that specific groups are performing. The band box also has separate folders for each instrument because I do have many instrument specific things that the kids need.
If one of my 7th grade choir students needs a copy of a piece we are performing they would look in one of the folders called “7th Grade Piece 1” or “7th Grade Piece 2.” 8th grade would do the same. If this same student was also missing on the 20th of the month they could check the box to see if there was an assignment given on the 20th.
A band kid that was absent could check on a specific date for any assignments, then check “8th Grade Band Piece 2” to see if a new piece was given, then also check the French Horn folder to see if the horn section was given anything instrument specific.
With enough coaching, you can get this system to become an automatic one that the students just check on to see if they’ve missed anything while they were out. Many of my students are still in the, “I noticed I have a bad grade. Am I missing any assignments?” boat. These boxes have helped me to pull their missing assignments SO. MUCH. FASTER!
-
Fun and Games with Rhythm Flash Cards

So you have a set of rhythm flashcards. When you teach students how to read rhythms you might start with the flashcards and chanting so that students only have to focus on one thing at a time. You only use your flashcards for group sightreading. The students are getting tired of flashcards, you’re getting tired of flashcards. What do you do?
Play games.
Rhythm flashcards can be used for so many fun games and can help liven up any performance based classroom. If you don’t know where to start with games and fun ideas for your rhythm flashcards, then you’re in the right place. Keep reading!
- Add Body Percussion
This assumes that you’ve taught students the four basic levels of body percussion, or have at least taught them a body percussion piece in the class beforehand. All you need to do is hand out copies of rhythm flashcards (I always have rhythms that I’m targeting for assessment) and give them your parameters.
By parameters I mean, do your students need to use the flashcards in a certain order? Do they need to put the flashcards in a certain form (AB, ABA, Rondo)? Are they only allowed to use two levels of body percussion or can they use all four? Do they even have to use the flashcards or are they allowed to compose from scratch as long as the rhythmic requirements are met? Lot’s of things to think about.
After Parameters have been set all you need to do is see if the kids are performing the rhythms correctly and with a steady beat. At the end of class it’s really fun to have the kids perform all of their compositions one right after the other to see how creative they were with all the same instructions.
- Have a Rhythm of the Day
Rhythm of the Day, Poison Pattern, Poison Rhythm, it’s all the same game! But the students still have so much fun and they want to win against the teacher. There’s nothing students love more than beating their teacher at a game, and there’s nothing I love more than the students getting specific, targeted practice on a rhythm.
To play all you have to do is take your set of flashcards and declare one is a Poison Rhythm. Have students perform and sight read this rhythm from the flashcard so that you know they can perform it. Once you’ve determined that they know how to perform the poison rhythm then announce that it is off limits. From this point forward, if students perform the poison rhythm when it is presented you get a point. If they see the poison rhythm and do not perform it, they get a point. The first to three wins.
- Compose with Flashcards
Getting students to compose music is a huge part of the national music standards, but I think it’s probably one that we forget to work on a lot. Flashcards can help us scaffold composition with our beginner musicians because they give the kids a nice comfy box. The box can be expanded later, but in the beginning they need a small box.
Assign several flashcards with familiar rhythms and see what students can do. This can lead to discussions about what types of rhythms made us feel like our compositions were complete and which rhythms made us feel like we needed to keep going. When you teach students about form, you can have them create a piece with multiple sections and discuss how they think each section complemented the other. I love composing with flashcards because it can lead to so many reflection opportunities and it provides the students with lots of choice and voice.
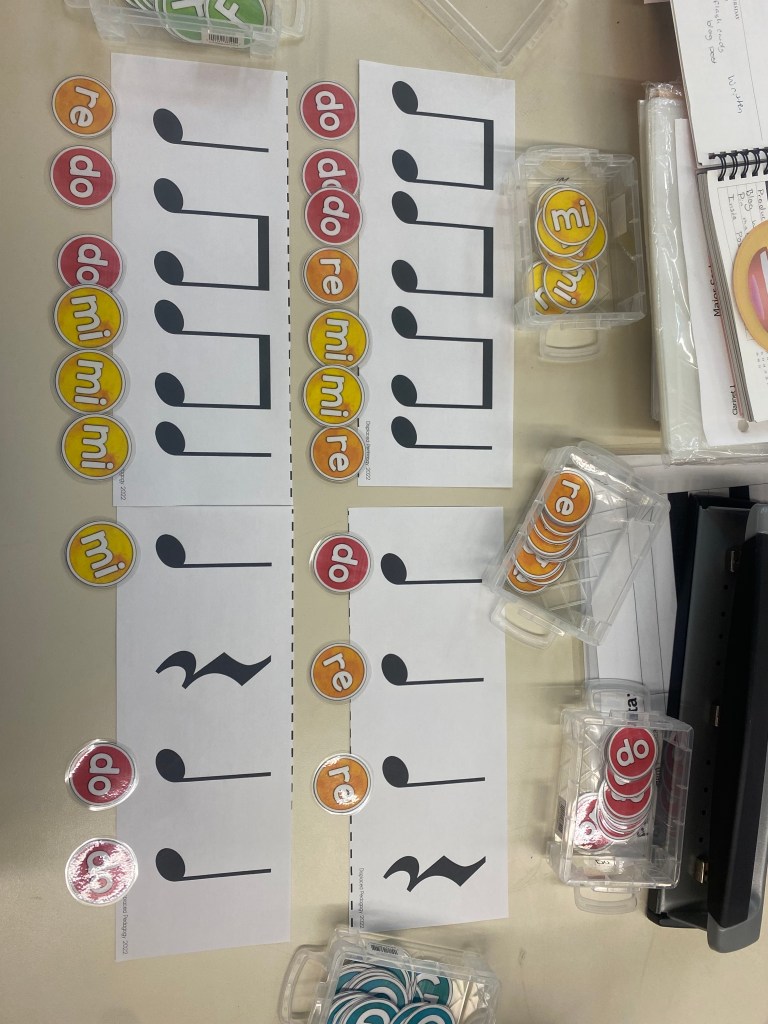
Rhythm flashcards with solfege dots underneath them. This is to represent one way that a student could compose a melody using rhythm flashcards. - Add a Melody
Similar to adding body percussion, adding a melody can be a great way to use rhythm flashcards. When we do this I start with a predetermined rhythm that I don’t let students change and a pitch set that I want them to focus on. This is also a sneaky way to get your band kids to practice specific notes.
Once again, you need to set specific parameters for the compositions. And when adding the melody I would highly encourage not letting them have a say in rhythm as each new note has a specific role that it plays in the scale. But they still get lots of practice on the rhythms because they’ll have to make adjustments to the melody a few times.
As you can see in the picture above I used solfege dots (I got these from Make Moments Matter on Tpt) to denote what solfege I wanted the melody to follow. They are super handy and can be found here!
- Play Four Corners
I love the game Four Corners! My students love it too. They love anything where they get to move around the classroom and not sit down for a few minutes. To set up four corners I place a card in each corner of the room that’s labeled A, B, C, or D. On the screen in my room I have a powerpoint with the rhythms and answer choices. I pick one of the rhythms to perform for the students, then they have to decode the rhythm in their head and move to that corner of the room. If they are correct then they get a point and get to brag to their friends. This continues until all slides have been gone through.
- Quiz Quiz Trade
Quiz Quiz Trade is a Kagan Cooperative Learning game. I am required to use Kagan strategies in my classroom, so I’ve had to finagle and work with them a lot to make it something that middle schoolers would actually use.
The first step is to distribute flashcards to each student. Students will stand up and find a partner. Once they find a partner, student A will quiz student B on their flashcard. Student A will either praise Student B for providing the correct answer, or will coach student B to the correct answer. Once this process has been completed student B will quiz student A and the whole process repeats. After both students have been quizzed, they will trade flashcards and find a new partner.
With this one you do need to watch and make sure that students are actually finding new partners and not just moving around the room with their one partner. I also add that students must check in with me for Quiz Quiz Trade one time, so that I can assess them.
- Headbands
Headbands is a classic game where one person wears a rhythm on their head and the other people help that person guess what is on their forehead. In the beginning of the year I will have students perform the rhythms on the headband and I will guess what rhythm is on the flashcard. This lets me know if my ensemble can perform all together and accurately. As students get more advanced, then they can start being the person wearing a headband. This really works the ear training and decoding skills!
- Gallery Walks
Anything that gets students out of their seats is a favorite of my kids. They love walking around and getting to actually talk to their classmates while we are in class. I use gallery walks every few weeks to help them scratch this itch and collect something to grade and use for interventions.
To set up a gallery walk all you have to do is tape a flashcard to the walls of your room. I would recommend at least 6 and no more than about 12-15. Students will walk around with a piece of paper that they numbered or an accountability sheet that you made and they will record their responses for each flashcard.
I will stipulate, make sure that you know where each number is so that you can help students if a flashcard falls off the wall. Make a key for yourself so that you can grade them easily. If you don’t want to make your own gallery walk I am working on making gallery walks for all levels of rhythms. You can get these from my Tpt shop!

A rhythm flashcard with quarter notes and a quarter rest taped to a cinder block wall. There is a number 2 drawn on it to show how one music teacher uses rhythm flashcards to make very easy gallery walks for her students. 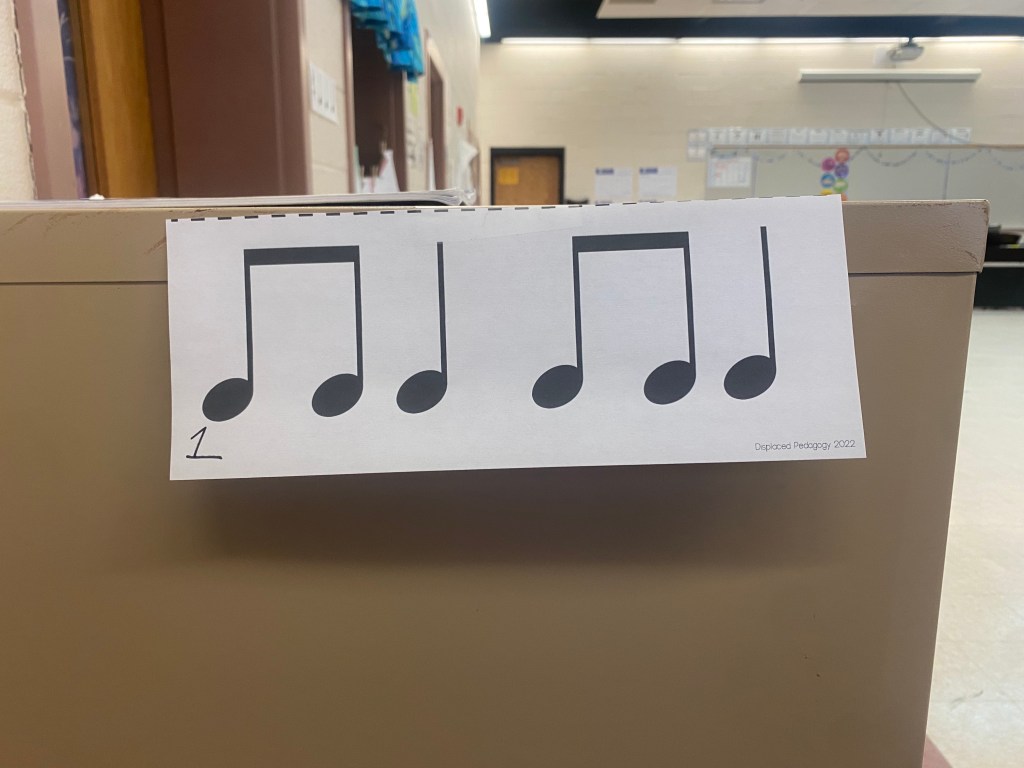
A rhythm flashcard with quarter notes and eighth notes taped to a cinder block wall. There is a number 1 drawn on it to show how one music teacher uses rhythm flashcards to make very easy gallery walks for her students.
You can also visit my Tpt shop to get FREE rhythm flashcards. All of my common time rhythm flashcards will be free! I am working on getting these uploaded as quickly as possible and I am working on making sure that they can be used for beginners all the way to advanced groups. -
Long Term Planning for Performing Ensembles

Why should I try long term planning?
If you’re reading this then I bet that you’ve heard of long term planning and want to know more. That was me a few months ago and I came to the conclusion that no matter what I needed a long term plan for each of my classes for the next school year. I teach middle school band, choir, and music history at my school. I knew my first year of teaching performing ensembles at this school that my students would have a very minimal, if any knowledge of music. I’m talking basic stuff like quarter and eighth notes, instrument names, treble clef note names. I wasn’t hoping for much, but I was hoping. They surprised me and seemed to remember a fair bit, so I was ecstatic.
That being said, in my district we are expected to submit lesson plans every week. Teaching three different subjects I had to write 15 lesson plans a week! I’ll be honest, I mostly just made up stuff that sounded good and then did whatever because none of the lessons made sense. I knew what to teach, and in which order, and I knew how I wanted to teach it. However, when it came time to put the plans onto paper, I just could never find the time.
This led to me planning concerts, but then doing most of the work at the last minute. I spent many days hoping that the kids had learned anything in class. And I was basically just surviving. I knew that something had to change before I went into the 22-23 school year. So this blog will describe reasons why I am sold on long term planning and the next blog post will break down how I made my long term plans.
What is long term planning?
Long term planning is basically a way to see all the things you need to cover in a year up close at all times. My goal for beginning band is to make it to page 40 of the beginning band book and be confident with those concepts. So in my long term plans I blocked out concert dates, the dates I would have to do instrument try out, any testing windows that I knew about or could guess on, and then I plugged in the sequence of note learning and so on a so forth.
Long term planning is a handy tool to see where you are, see where you’re going, and see what steps need to be taken to get to the goal.
Why is Long Term Planning important?
- I Needed to be able to see most of the year in one go
If you’re like me then you’re a very visual person and you are a busy person. I wanted to be able to see every single thing that I will teach in a year along with all the other things that I reeeeally hope I get to teach throughout the year. In my current year-long plan I have dates, rhythms being taught, notes being taught, expressive and mechanical topics, composers, and musical cultures that I would like to teach. I only use this document to list topics on a general date in the school year.
My old year long plan from last year is based off of a template from my school district and it just didn’t suit my needs. In that document we were asked to list our topics, standards, and vocabulary terms. This is fine, but since I have so many things that overlap together it just seemed impossible to fit a band or choir curriculum into that template. This template works fine for music history and I probably won’t be changing it much, but I needed a significant overhaul for band and choir.
- When you feel terrible, the plan helps you un-cluster yourself
I’ll be honest, we took too many rest days because I just felt so anxious about
deadlines and other things that I couldn’t even begin to focus on trying to teach my students. We had many cleaning days… However, during testing season I experienced that if you plan in advance (better than I had been) that it’s still really easy to teach even if you don’t feel wonderful and ready to go that day. So I’m developing the long term plan for next school year in hopes that I can get over the “I feel really terrible today” funk.
- It’s a lot of work upfront, but It’ll help you make daily plans faster
Once again, I have to plan for band, choir, and music history. That’s three different classes and three different curriculums I teach everyday. I very quickly this school year fell in the ocean of lesson plans. I was able to keep my head above water this year with music history because I could still get something useful out of the pacing guide that I made in the beginning of the school year.
- You’ll have a better idea of what to put in your pre and post assessments
This past year I relied on quizzes after each subtopic to help me figure out what students understood and what they needed more help with. This isn’t a bad thing at all, but it meant that there were more days spent test taking than were probably necessary. I want to spend more time actually teaching my students next year and I want to do more formative and less summative assessments. I also want to have my students be able to look at their growth from the pretest to the post test and be able to see actual growth, not the “our teacher had to take a few questions off the test and add two or three more because she lost sight of what she was doing half way through” growth.
I know which notes, rhythms, vocabulary, symbols, and “extras” to include on my pre and post test in the next school year. Knowing what I want to assess via a paper and pencil test I can also determine a suitable playing test for my students so that they can demonstrate the skills in multiple formats.
In Summary,
I hope I’ve been able to convince you to try a long term plan for your ensemble class next school year. I am excited to try it and have been eagerly planning my first unit already. (My inservice days are going to be really easy next school year!) If you’re interested then come back next week and see how I actually make the long term plan! I’ve already completed both plans for the bands next year, so you’ll get to see the long term plan for the choirs being constructed.
-
Opening Routines for Band Class
What is an opening routine
An opening routine is a set of procedures that students do at the beginning of class to get prepped and ready for new instruction. They can either be simple or they can be elaborate. If you have an elaborate opening routine I suggest writing it down and displaying it somewhere in your room for students to see.
Perhaps you have it listed in any slides you display, or you can just write it on an anchor chart and stick that on the wall. Do what works for your class the best and keep doing it.
What are some examples of opening routines
Opening routines involve getting out equipment and supplies that students might need for the day. They can include a self start (thechoirqueen on instagram has some good examples) or a bellwork about previous content or something to prime students for upcoming content.
In my classroom, students are expected to get out their chairs, do their bellwork, get their music stand and music out, then get their instruments and warm up until the timer goes off. Then we start a group warmup that targets and reinforces our rehearsal for the day.
Is it too late to start if I didn’t start at the beginning of the year?
It is never too late to implement a new routine, you just need to be consistent and clearly define the expectations. Give it a few weeks (about 2-6) to see if the new routine works. If you need to make a change, like not having instruments for the day, make that announcement very clear, and notate the routine for the students so that they can see clearly what to do and don’t lose their minds.
If you need some ideas for bellwork to do, visit my Tpt store and check out the bellwork I’ve created for learning fingerings.

-
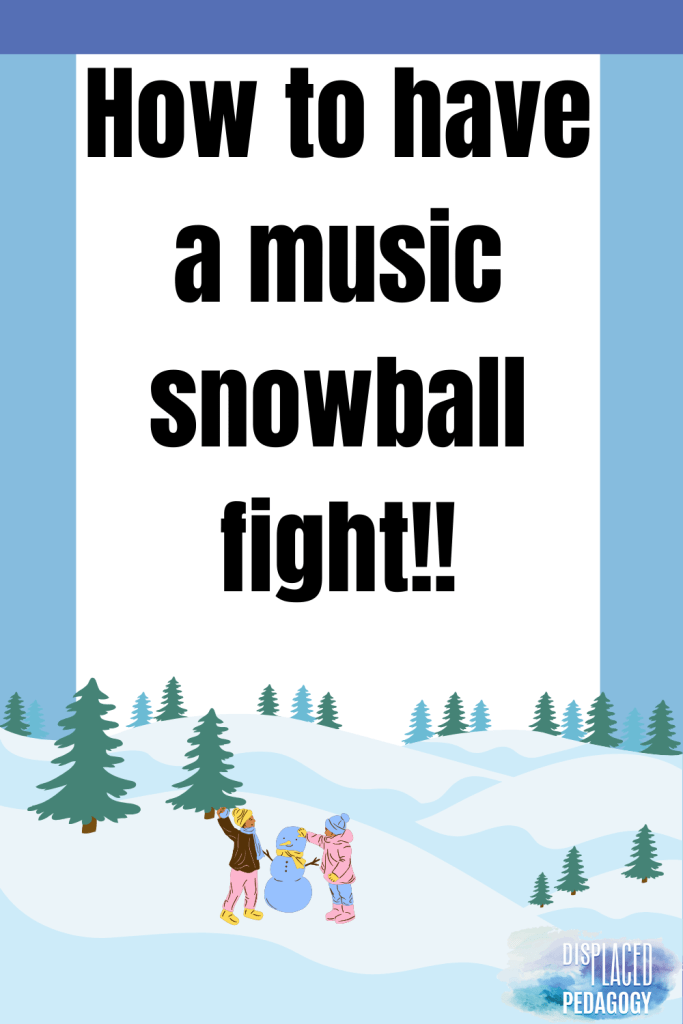
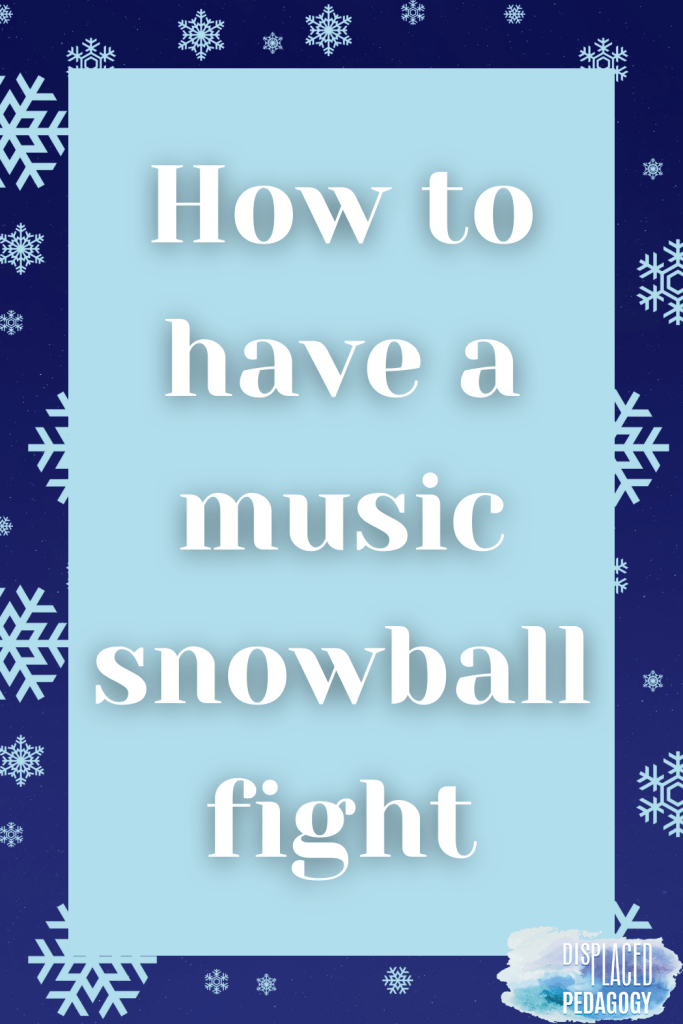
Music Snowball Fights

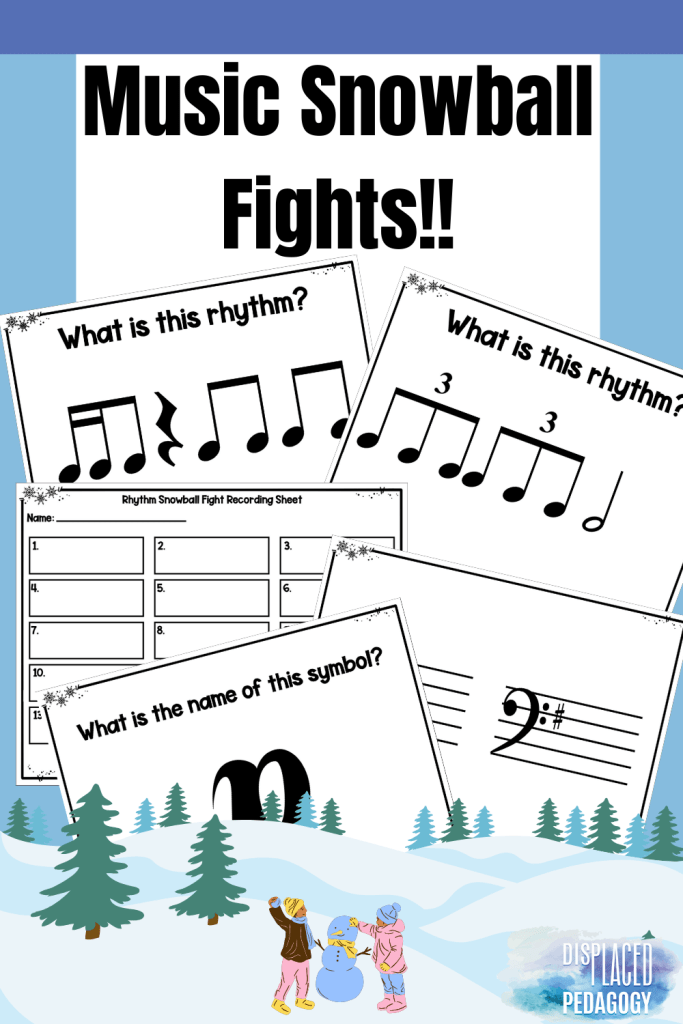
What is a classroom snowball fight?
A classroom snowball fight is a novel experience to have with your students before the holiday break. You can practice many skills during a snowball fight to reinforce and review previously learned content. And honestly, it’s just a fun way to spend a few minutes during class.
Why have a music class snowball fight?
Because when the kids are acting crazy you can either drive yourself insane by maintaining order. Or you can maintain SOME of the structure and let the kids do something that will let them feel like they’re cutting loose. The snowball fight is a very novel experience and your students will definitely remember.
How to have a snowball fight in the classroom?
Prepare all your papers and materials that you need. (This will vary depending on if you’re using a flashcard snowball fight or a composition snowball fight.) Set the safety and/or ground rules for your students. In my classroom this would be no yelling (followed by practicing “whisper yelling”), walking only, and don’t aim for the face.
Next explain that students will have to complete and record their work on their recording sheet. Students then crumple up either the flashcard or their composition and throw the paper snowballs across the room for 15-30 seconds (however much chaos you can tolerate).
Once the timer goes off then students uncrumple the snowball closest to them and they work as outlined in the instructions until it is time to have the snowball fight again.
Types of snowball fights you can have in the music classroom
Flashcard snowball fights
Flashcard snowball fights are where you have a flashcard that you are throwing. For example, your student is holding flashcard number 4. Your student will record the correct answer to flashcard number 4 on their recording sheet and (per the instructions in my snowball fight activities) use the think-pair-share instructional method to check their answers in real time.
You can call out a flashcard number, or a student name, to check in on one or two students before restarting the snowball fight. I would do this just to make sure that the students have answers written down and are doing the academic part of this activity.
If you need a quick snowball fight activity I have an entire bundle of them in my Tpt store. There are also dynamic and key signature snowball fights.
Composition Snowball Fight
Give students a sheet of manuscript paper and have them compose four measures of music following other specific guidelines you created. Have students crumple up the paper and throw the papers all around the room. Everyone picks up a new piece of paper when the music stops. Students compose four more measures of music. Repeat until you have four rotations. On the fourth rotation talk about how to generate musically satisfying endings.
Skills to practice with snowball fights
- Rhythm Dictation
- Melodic Dictation
- Composing Skills
- Music Theory Topics
- Music History Topics
- Honestly anything you can think of!
-
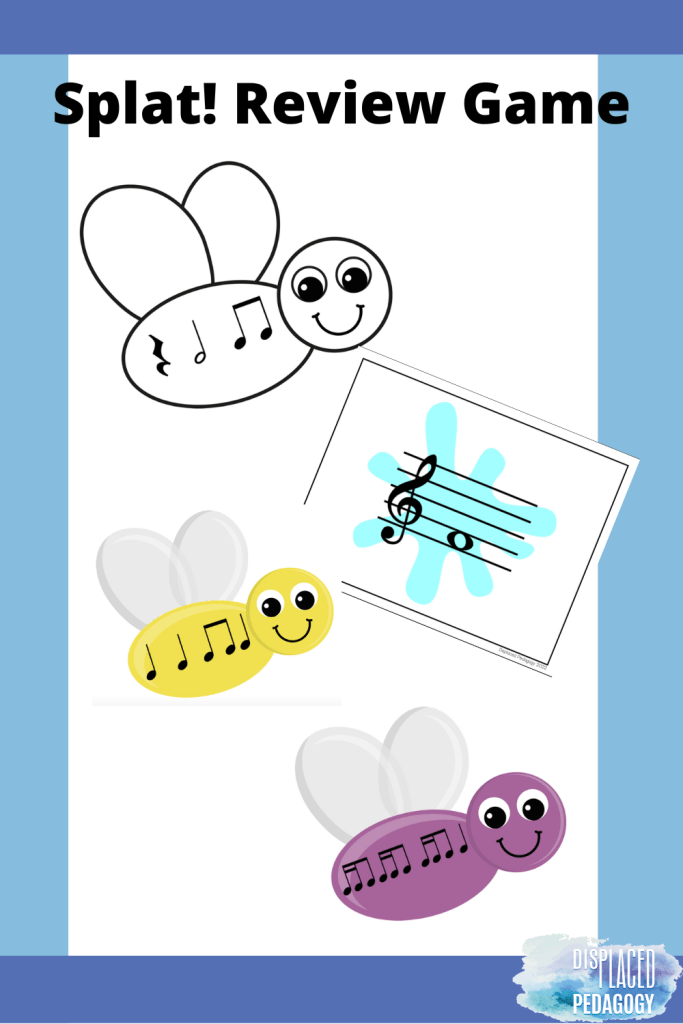
My Students’ Favorite Review Game in Music Class

Are you giving a test soon? Do you need to briefly check to see if students understand a concept you just taught? Do we just need a break from rehearsals? (I won’t tell anyone if you do). Then its a good time to play a review game and make learning fun again! I’m going to describe one of my students’ favorite review games.

What is Splat!?
Splat! is a racing review game that I’ve used with almost every type of content from rhythms to music history vocabulary and I’ve even used it with note names!
I like using the fly visual you see above because I think it’s just adorable and the kids think it’s silly to hit a fly, but you don’t have to use the fly flashcards; any flashcard you have can work.
How to play Splat!:
- Break your students into two teams. Part of the fun of Splat! is the racing component.
- Create two sets of flashcards to use with your students. I’ve always used two sets of the same flashcards to avoid “he blocked me from the card!” and to make sure the kids didn’t have their hands on each other. If you don’t have this problem, then one set of flashcards should be fine.
- Adhere the flashcards to the wall. I make sure that all the flashcards are available all at the same time so that the kids have to race to find the correct flashcard first.
- Clap the rhythm that you want students to find OR if using melody, sing the melody you want students to decode and find. Students now have to race each other to find the correct card. The first one to find it wins.
- If you decide to use vocabulary in your game of Splat! then you can either say the definition of your vocabulary term and students have to find the term OR you can say the vocabulary term, and they have to find the definition.
My students have always loved Splat! and even my rowdy kids are into it because they get to briefly channel their energy in a productive manner. If you are interested in checking out the Splat! games I have created then you can look at the money saving bundle here! Every current and future Splat! game can be found using that link. But you don’t have to purchase the bundle to play the game. Any flashcard will work and I’ve also just written terms on my whiteboard with the dry erase marker.
-
My Favorite Quotes About Music

This isn’t an exhaustive list of quotes about music, but these are truly my favorite quotes about music.

“I think music in itself is healing. It’s an explosive expression of humanity. It’s something we are all touched by. No matter what culture we’re from, everyone loves music.” – Billy Joel
“Music is the shorthand of emotion.” -Leo Tolstoy
“The world’s most famous and popular language is music.” -Psy
“After silence, that which comes nearest to expressing the inexpressible is music.” -Aldous Huxley

“If you want to make beautiful music, you must play the black and the white notes together.” -Richard M. Nixon
“Life seems to go on without effort when I am filled with music.” – George Eliot
“Music — what a powerful instrument, what a mighty weapon!” – Maria August von Trapp

-
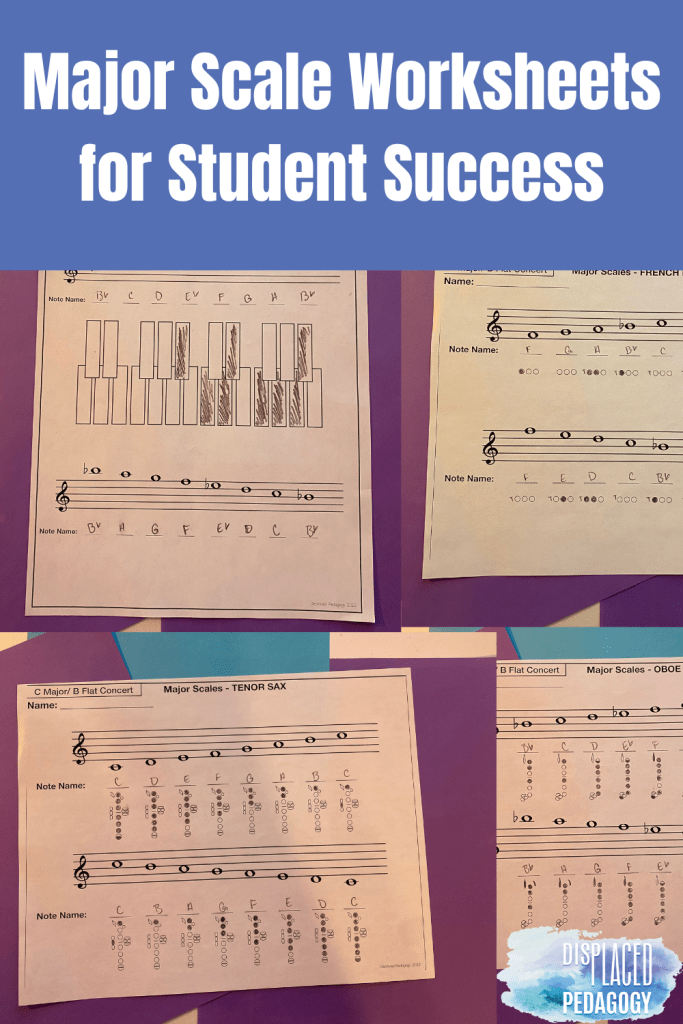
How to Use My Scale Worksheets in Your Classroom

Scales.
The dreaded musical building block of the beginning band. You and I know how important scales are to being a great musician, but our students don’t. If you’re like me and you love scales (I seriously love playing scales) then you might struggle to also get students to practice the scale.
I actually noticed that some of my students were really struggling to play scales one day and I made these Major Scale Worksheets to help them be more successful. I am happy to report that my students all know the required scales inside and out and many of my very motivated students began asking me for these worksheets so they could work ahead on their scales.
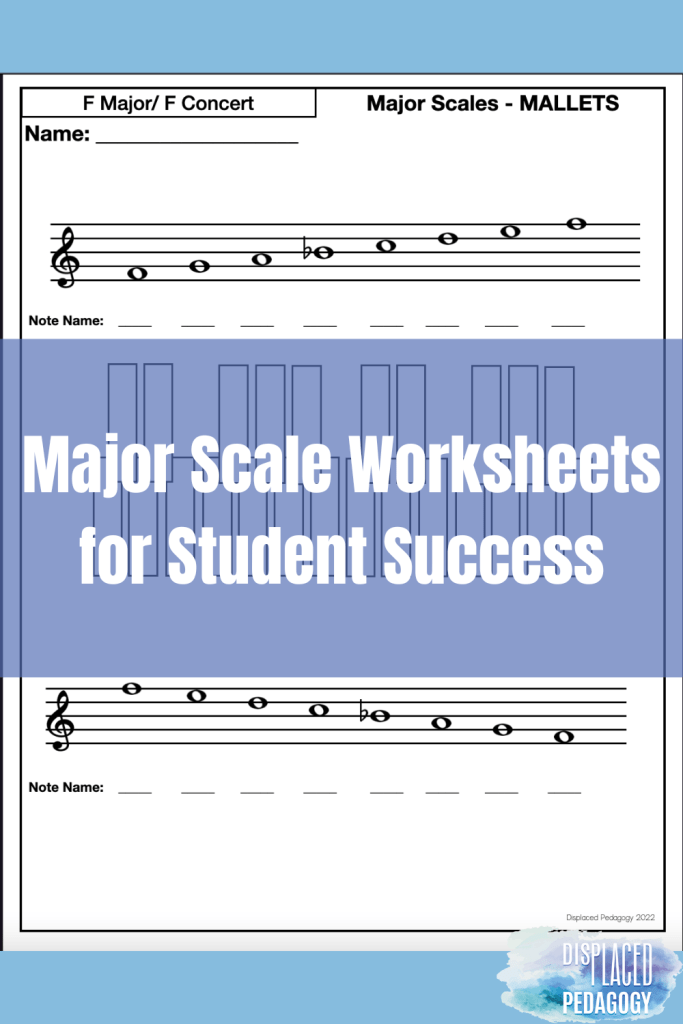
What are the Major Scale Worksheets
The Major Scale Worksheets are designed to help students that struggle with visual tracking feel more successful while they are practicing scales. One day I noticed that I had a lot of very motivated students who wanted to get into the Scales Club in my school that were just struggling. One day I decided to stand close, but not too close, to a student who was practicing so I could just observe what they were doing without stressing them out.
In just watching this student I realized that having to look at a note on the staff, then finding that note on a fingering chart, then placing the fingers correctly, was a HUGE struggle for many of my students. So I wracked my brain trying to figure out if any tools existed that combated this problem, and after much searching, I couldn’t find anything. I knew that if I wanted to ease this burden for my students then I would have to make the tools myself.
As you can see in the picture above, I wrote out the major scale using accidentals then I left a space for students to write their note names underneath the note. Under that is where the magic happens. I placed a blank fingering diagram under the note name space so that my students wouldn’t have to look between multiple pieces of paper anymore.
I tested this out with my one kiddo I noticed struggling the most (the same kid I initially watched in the scenario above) and after a few days he was doing so much better with that scale!
Why Should You Use Them in Your Classroom
I’m definitely biased, but I think these are awesome! I teach in a low income, high needs school and many of my students come to me with little (or absolutely no) prior musical experience. So I am trying my best to rehab an elementary education, all while teaching my kids all the things they need to know and beginning instrumentalists.
These worksheets are a great visual resource for your students who struggle to remember and synthesize a lot of information on the spot. If you’re in my situation it helps your kids who just can’t handle looking between multiple pieces of paper.
It also keeps them from writing in their band books; because they are writing on something else.

How Can You Use These in Your Classroom
Formative Assessment on Required Scales
There are a few scales that I make required for every student to learn. Those are the B-Flat Concert Scale and G Minor. We learn all of those notes well within our first year, so those are the scales they should have memorized and ready to play. (If we get further along or have a piece in a different key then that becomes a required scale too, but I’m getting away from the point).
I make this a formative assessment before any scales playing tests so that students can’t look at me and say that they didn’t know the notes or fingerings. It’s like a pre-check to make sure they know all the information and have a place to find it before they perform it as a grade.
You do what you want when grading, but I give one point per piece of information that they have to provide on the sheet. If a student misses an accident I take away a half point. If the student misses a fingering by one or two keys they miss the point. All incorrect answers have to be redone until correct.
You can visually monitor woodwind scales.
If you are like me and you’re in the situation where you teach all the instruments at the same time by yourself, then this can help your tired teacher brain visually see if your students are going to learn the correct fingerings before you set them loose.
Clarinet fingerings are not my forte as a trombone player, but I know all the rules for which fingerings to pick when. My students don’t yet. Or maybe sometimes they just forget because they use a different fingering more often. Either way, I’m helping them play the scale in the easiest way possible, which means faster success and less frustration!
Use this as a Memory Test
Does your administration require you to give paper and pencil tests like mine does? Give this as a quiz to end the B-Flat Concert unit!
Use this as part of a Substitute Plan
I don’t let my students practice in my room when I have a substitute. I know, it’s a controversial opinion. I have a lot of…behaviors… in my classes and I don’t want a substitute to be responsible for filing an incident report for injuries caused by flying equipment and I don’t want to pay for repairs when I didn’t witness the accident to see if it was intentional or not. (I have good classroom management, but I have kids that try to pull over everything on substitutes).
To the main point though, I leave a paper and pencil assignment every time I am out for the day. I’ve got students trained on how to complete this and subs love that they don’t have to explain how to complete these worksheets because I rarely get a sub with a music background. I had one once who called a friend that plays organ to answer questions so he could help out my kids!
The sky’s the limit with these! If you think that you would find these Major Scale Worksheets helpful you can purchase them from my Tpt store or you can take screenshots form a music notation software and use this fingering diagram builder.
If you notice any errors at all please let me know! You can contact me at displaced.pedagogy@gmail.com or leave a comment on Tpt. I am a trombone player, so it’s very possible that I might have goofed up on the woodwind worksheets. My students don’t always catch my mistakes because they are so used to them!